
3 simple guidelines for hanging drapery panels
/Confession time: improperly installed window treatments are my absolute design pet peeve (followed closely by "floating" area rugs). I can't take it. Inside of me is a little OCD designer that wants to rip down your curtains for the disservice they are doing to your windows.
And I know most people just don't know any better. So if I cringe a little in your home, don't take it personally. I mean it--design is what I do. It by no means serves as a measure for what kind of person you are. Just like if you were a gardener you wouldn't judge me based on the fact that 90% of our veggies failed this year (true story).
Once upon a time I had a page (or more) full of detailed instructions on how to properly hang drapery panels. But if I was being honest with myself, I would know that few people would actually read through all of them.
So, for the good of myself and for you, I'm making it easy. I guarantee if you follow just these 3 easy guidelines, you will notice a dramatic improvement in your room. Properly installed window panels can make a room look so much more tailored and sophisticated.
Here's an example of good and bad installations (read captions below for explanation):
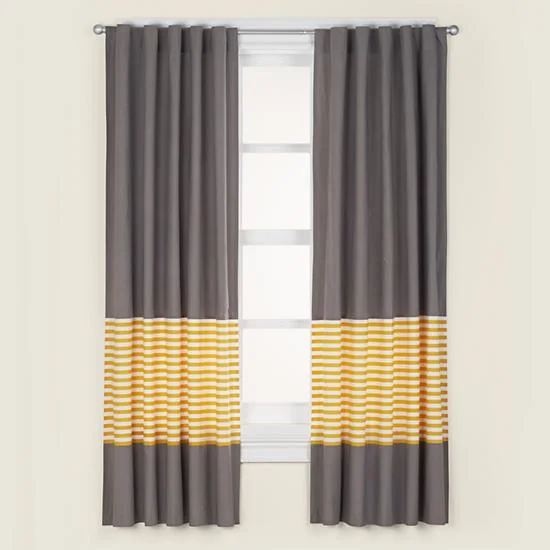
BAD! 1. The panels are just floating in the air. 2. The hardware is mounted at the molding. 3. The edge of the curtain is at the edge of the window, so that the panels cover the majority of the window.
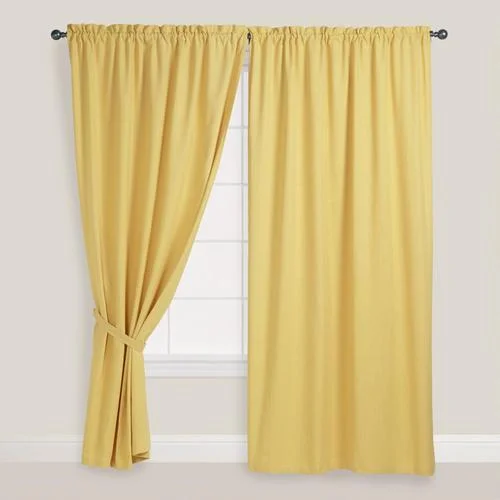
BAD! 1. Again, the edge of the panel is at the edge of the window--too much window is covered. 2. the panel is not wide enough for this window--notice how it is pulled so there is very little pleating or folding in the panel.
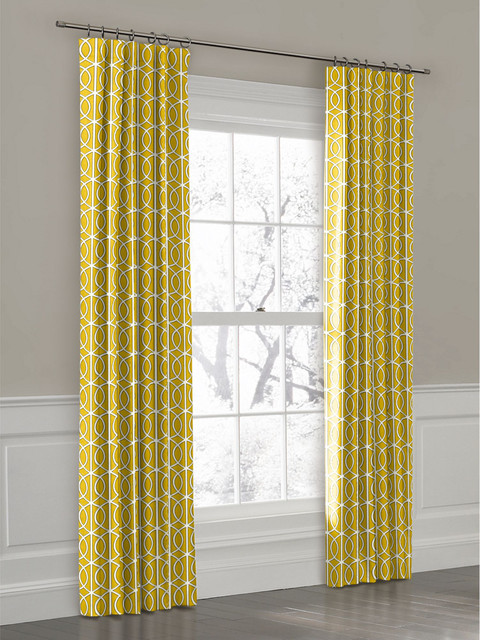
GOOD! 1. The panels fall softly to the floor. 2. The width of the panels is extended past the edge of the window; there is still plenty of window showing. 3. the rod is mounted at a nice distance above the window molding--this window is dressed, not covered.
So based on the photos above, here are my THREE RULES:
1. Cover your baseboards. I don't want to see them. Do not leave your poor window panels floating in the breeze. How do you do this? Before buying your window panels, measure from the top of your window molding to the floor. You want to purchase panels that are longer than this distance. If you need to hem, then hem. Hem tape is my best friend, and it can be yours, too. Use it. You can also "puddle" your draperies if they're too long, but this is a more traditional look. I don't see it done too often these days, even though in the right setting it can look very elegant.
2. Mount your panels so that they cover half wall and half window. In other words, take them past the edge of the window and push them back so that they pleat and fold nicely. Not only will this keep me from developing a nervous twitch, but it will also make your windows look much bigger, and more natural light will be coming in.
*If you are actually looking to cover your window (like if for some reason you are part vampire and hate daylight, or you have a toddler that you need to convince to stay in bed past the break of dawn), either buy more/wider panels so that they maintain a nice pleat when your window is covered OR you can create a layered effect with roman shades or sheers, like so:

And honestly, you could omit the panels all together and just use attractive roman shades if you wanted to save money and the headache of installing panels. (image via)

Here, you can tell they have plenty of material to pull across the window to darken the space, but they also have sheers as well, if they want to let a light in but still maintain privacy--very well done. (image via)
And last but not least....
3. Measure, measure, and plan. Bad window treatments are like eyesores. They make your windows look dark, box them in, and create bad focal points. Properly used window treatments are accents to the sources of natural light in your room. They can definitely be used to bring in color and texture, but if they are going to have an actual purpose, make sure they serve that purpose well. You should put thought into your window treatments. ALWAYS measure your windows before you buy panels. The best thing you can do before mounting them is hang them on the rod, have a helper hold them on the wall, and mark exactly where you need to install your mounting hardware before you just pick a spot in your wall--or worse your molding. Please don't drill into your molding.
And another little tip--avoid most pre-packaged window treatments. I know they're inexpensive and easy, but rarely will you find panels long enough for the standard window. Don't ask me why. I guess it's because major retailers love to drive me insane with their lack of design sense. And, if you are vigilant, you can catch good deals on window panels pretty often. In fact, right now West Elm has a few on sale for less than $20 per panel. That's a great deal!
Of course there's a much more detailed science to hanging window treatments (that involves more math than I care to get into), but for the regular, every-day person out there just looking to dress your windows, the three tips above will put you leaps and bounds above the rest.
I promise.
Until next time!
