Color with Doors
/I've been dreaming of painting a few doors in our house for some time now. I really want to tackle the front door, but I'm so indecisive on the color for the outside (I know I want the inside of it to be black). Our home is tan with cream trim and it definitely needs a little somethin' somethin' to wake up the front porch. I think a freshly painted front door (and new light fixture if I'm being greedy) will do just the trick.
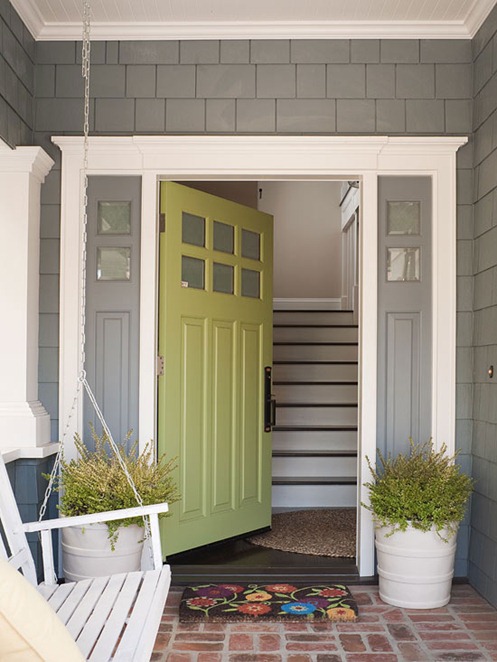
I love this gray and green combo.
Our front door is not the only door I want to paint. We have far too many interior doors (including 4 pocket doors) to even think about painting so I'll leave them white. However, I do have an itch to paint the door in our laundry room that leads out into the garage. Right now it's a white door in a tan room with slate tile and a white washer and dryer. It needs something. A fun colored coat of paint on the door would be perfect---not to mention easy. You can paint one side of a door with only a sample size of paint in most cases...which means it would be a nice room update for less than $5! And if I use one of my many sample colors I already own, it'll be free! Decisions, decisions.

I always love when I come across rooms that have a door in an unexpected color. Painting a door in a different color makes it stand out and become a fun accessory in the space instead of a typical, overlooked necessity.
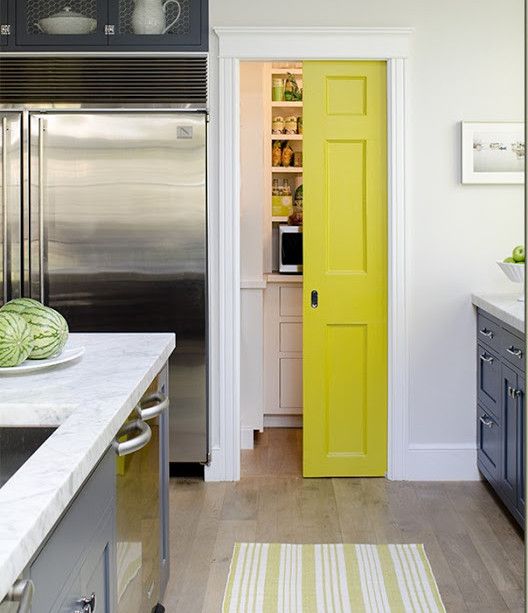
Oh hello beautiful pantry door!*
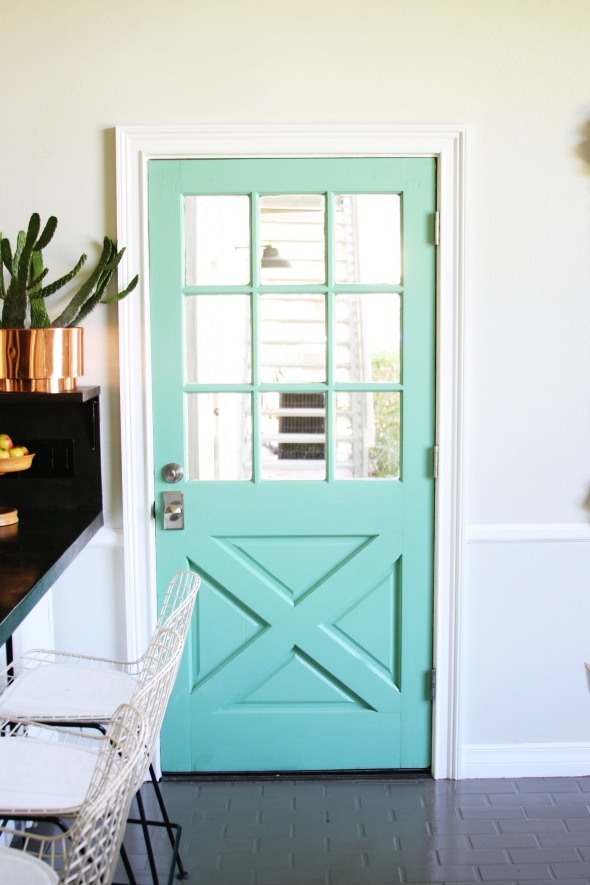
Here's Emily's mint door from Little Green Notebook.

Then there's these blue beauties.

A little coastal blue.
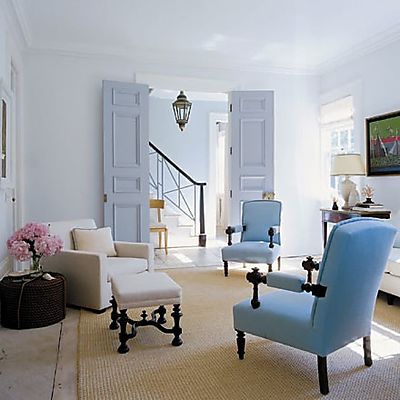
Periwinkle is my favorite.

Everything about this kitchen is lovely, including the door.

Coral, anyone?
Whenever I make some decisions, I will let you guys know (and see!)
*Click on images for sources.