nursery turned toddler room
/This weekend we ventured to a family reunion for the day, and in addition to seeing lots (and lots) of extended family members, we also picked up a couple of cool family heirloom pieces.
Twin beds! Slept in by my mom and her brothers and sisters, as well as my sister and myself, and since then have been in the possession of my uncle who's sons slept in them. And pretty soon (but not too soon) my 16 month old will make her way into one of them.
I would post a pic for y'all to see, but they are currently still in pieces and wrapped up from the journey home. But they are solid mahogany post beds, somewhat similar to this:

Not only is it special to have a family antique like that, but it's not often you find children's furniture that's made of solid wood. I'm excited to get them put together (although they'll need a little work).
Little nugget is still in a crib so that means I have to rearrange her room to work in a twin bed until she's ready for the transition. The guest room has a really comfy queen bed in it, so there's no use in changing anything about that.
Here's her room now (also don't mind the few discrepancies--by no means is has the room been styled or professionally photographed; I just cleaned it enough to look decent in a quick photo):
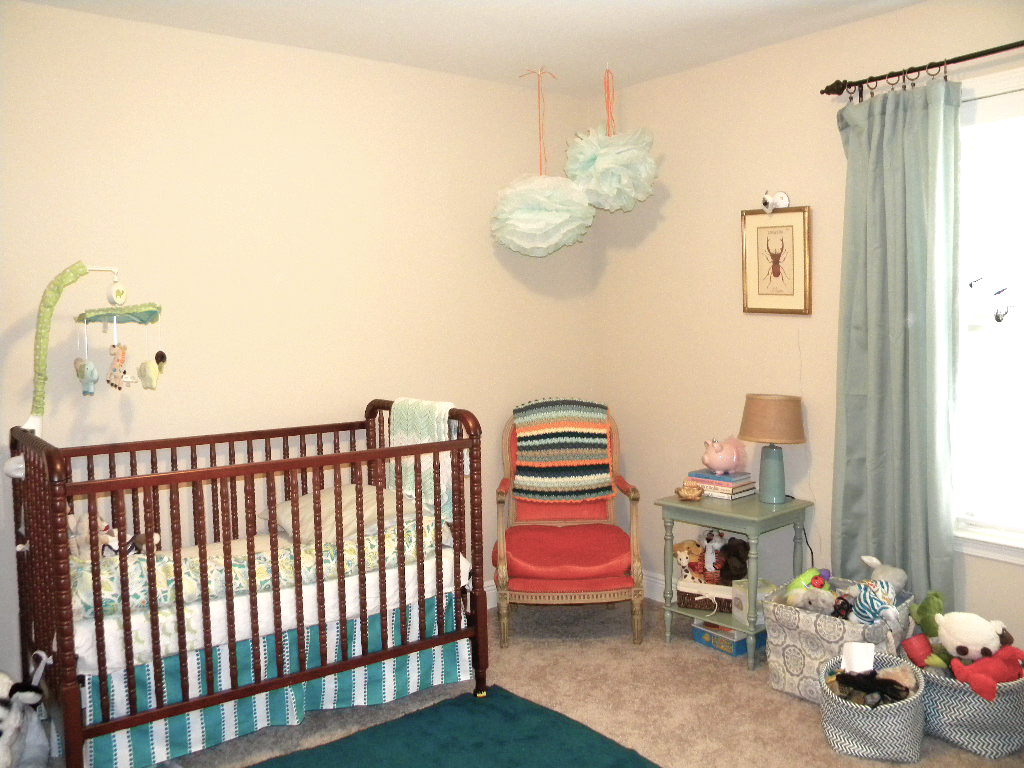
The crib is a mahogany Jenny Lind; the chair an 1880s re-upholstered French antique store find named Charlotte (I have a thing for chairs and naming things); the crepe paper pom-poms were hand-made decorations from my baby shower. I still need something behind the crib, but since the whole layout of the room is changing soon, I suppose that doesn't matter for the time being. The mobile will come down, since she's long outgrown it. I'm honestly surprised it's not broken; she yanks on it all the time.

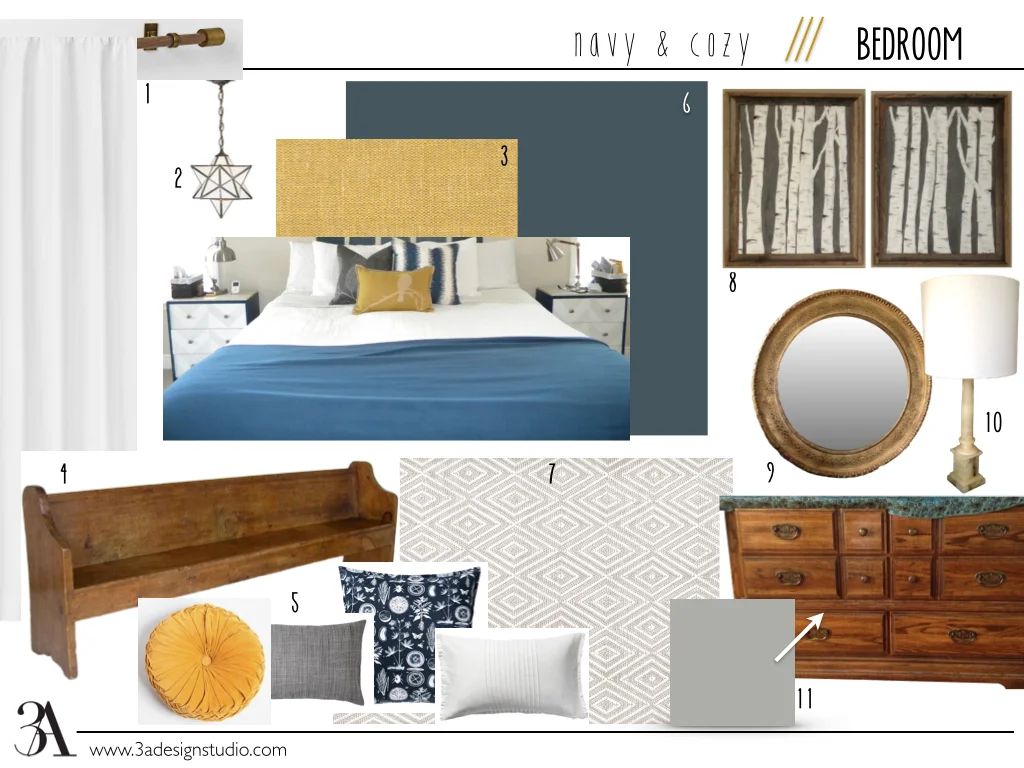
There she is in all her bed-headed glory, upon her rocking horse that her grand-Papí made (shortly after this photo she was wailing for me because she decided climbing over the front of the horse was the best way to dismount.) The chair is an antique "kindergarden chair" that she got for her first birthday from my uncle (and don't tell her but it's probably going to become the Time-Out Chair). Obviously I haven't painted the walls, but I don't plan on it anytime soon. I figure, soon enough she'll have her own personality and then we can pick a color. Why create more work for ourselves? I mean I already have a half painted navy bedroom.
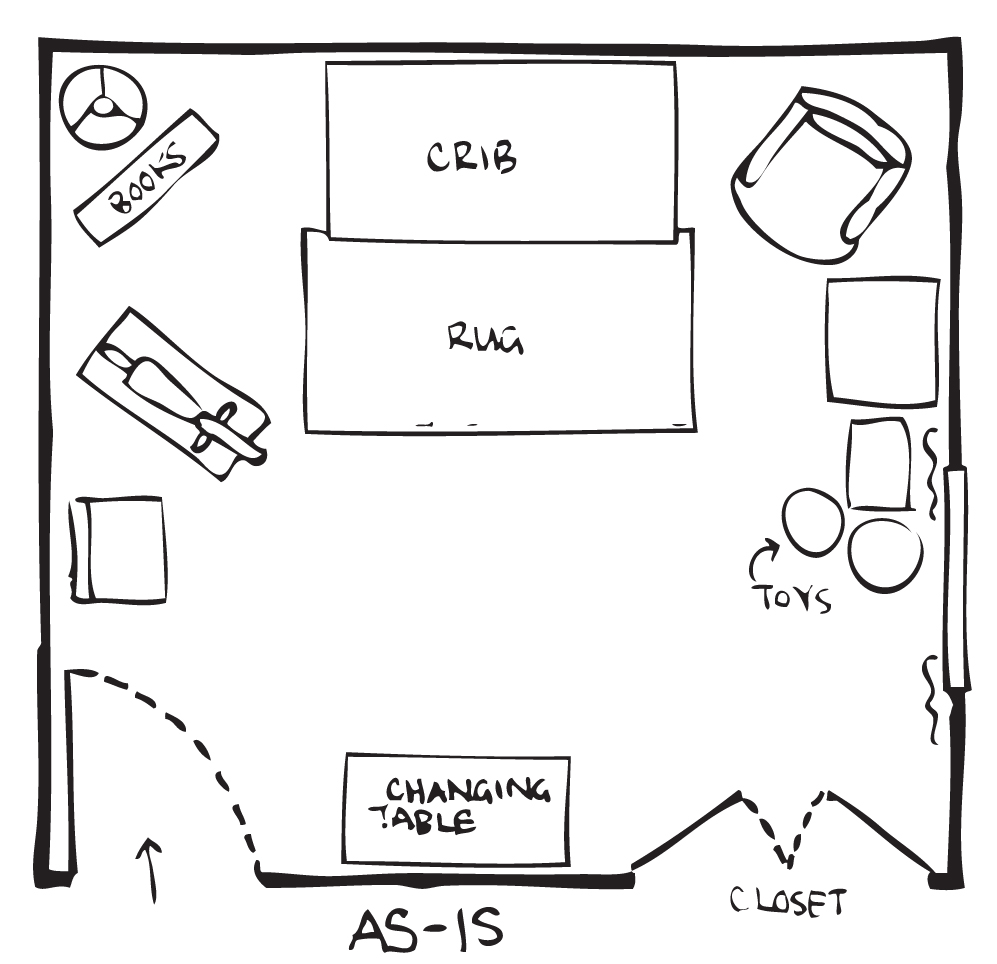
And here's how the room is laid out in plan view:
And here are the options for incorporating the twin bed:
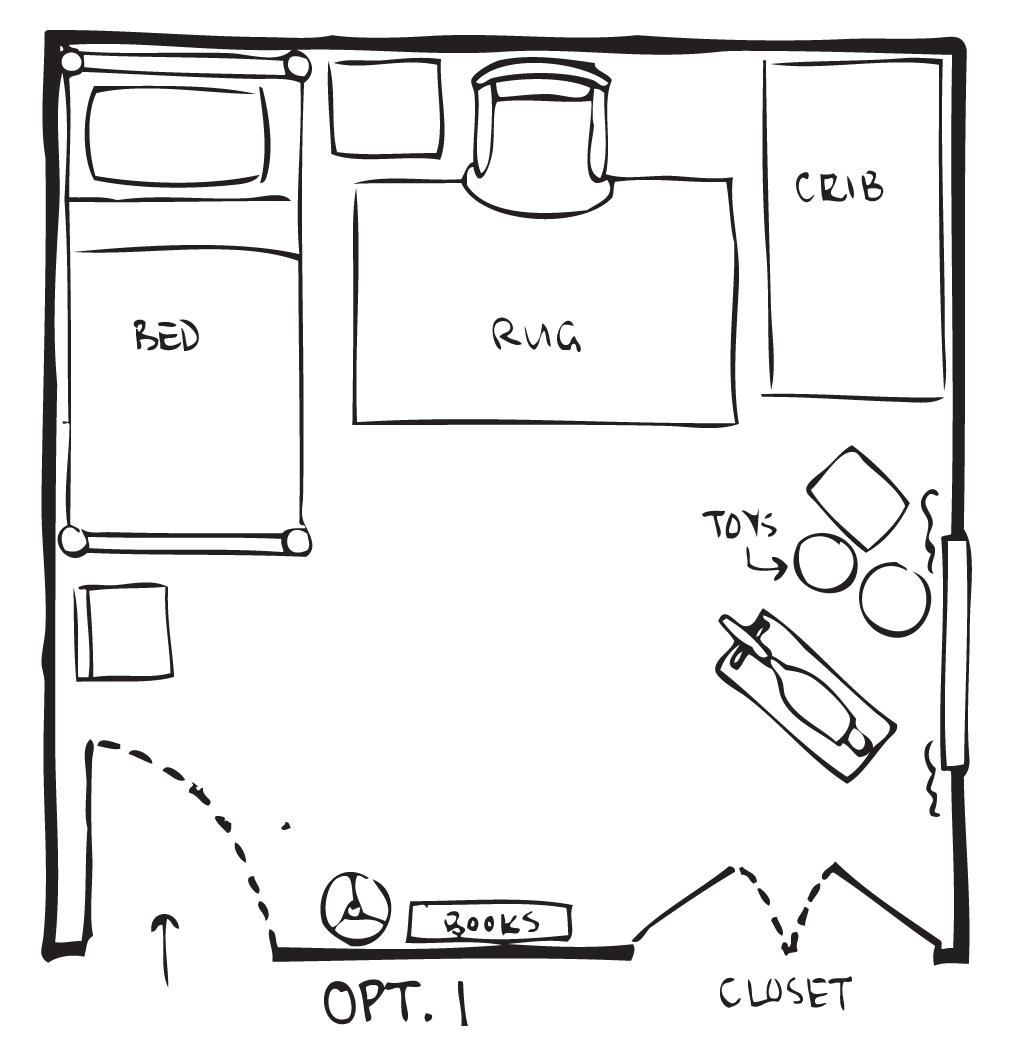
This option moves the changing table into the closet to be used for storage. Let's be honest, when you have a toddler, changing tables get used once a day, and even then it's a battle. The floor is your best option. Anyway, this is similar to how I would arrange the room if for some reason I kept both beds (my sister may take the other for her daughter).
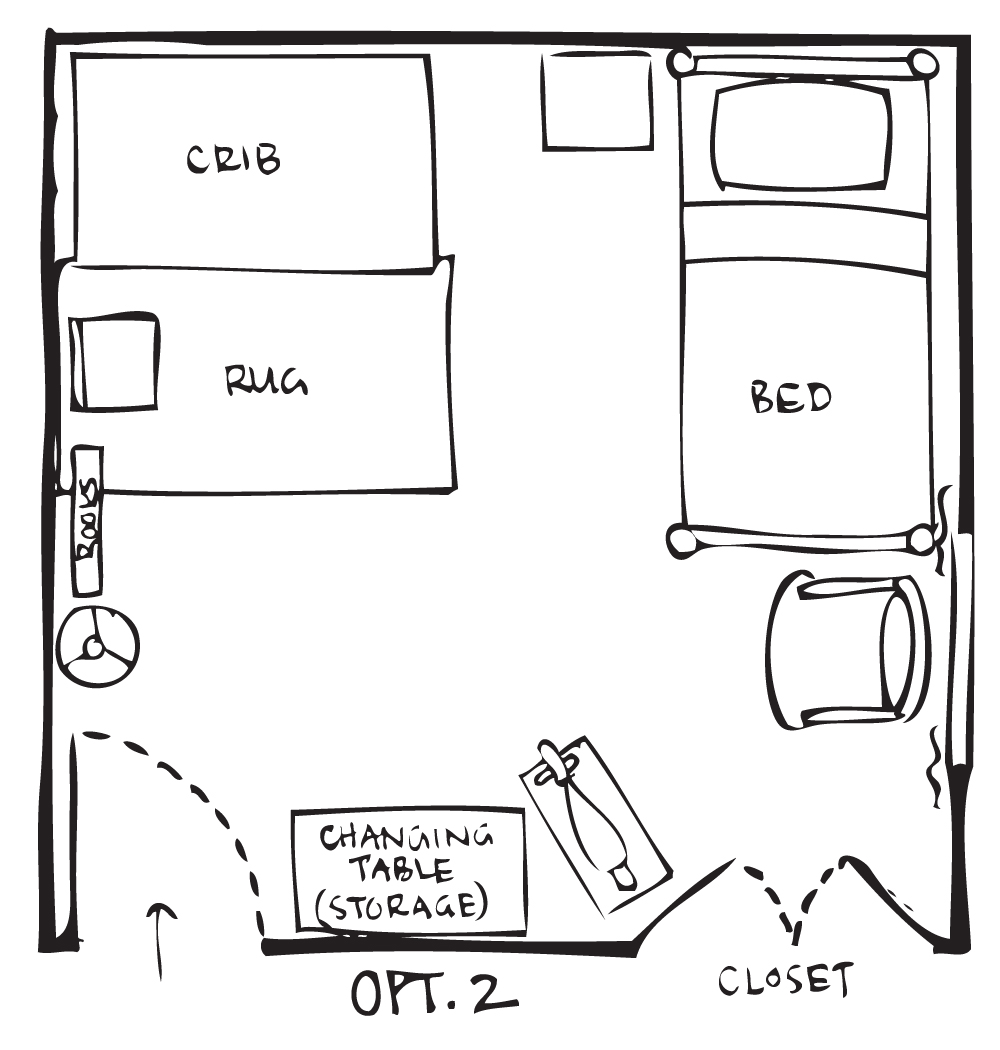
This option repurposes the changing table as storage. It's open shelving so I would just move the toy baskets onto the shelves.
So what do you think?
Right now I'm leaning towards the first option, but ultimately it will depend on what it all feels like once I get it in there. It may end up being nothing like the way I've drawn them. Even still it's a good excuse to give that room some attention since all I've added since we moved in were the draperies and the photos for the gallery wall.
As usual, I'll keep you posted!
Until next time!