Client Project: Farmhouse Before and Afters

We last showed this client farmhouse project here, but now we're back with a few before and afters!  

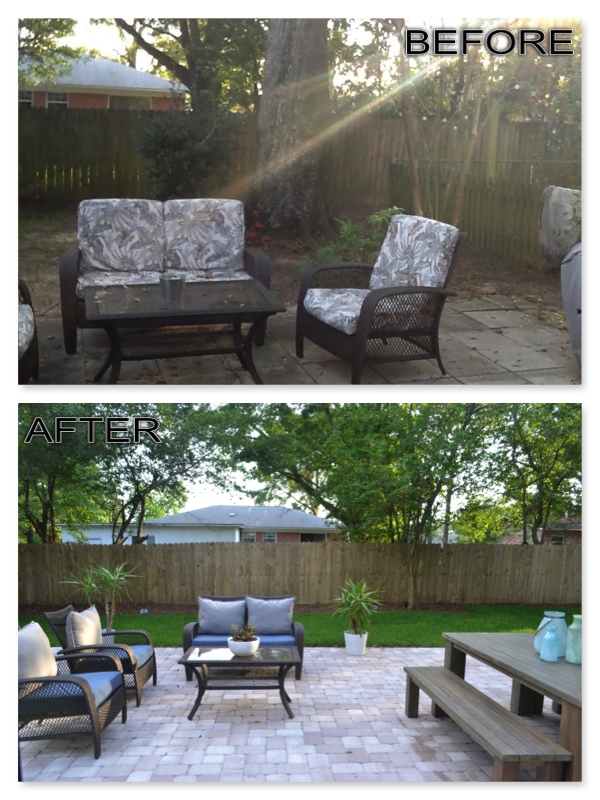
Special thanks to our awesome client for sending us these updated photos!  

One of the sad (for us) things about doing E-design is that often our projects are too far away for us to "check-in" on or photograph after.  So when clients send us some after shots, it is a real treat, and we thought you guys might want to see too. 

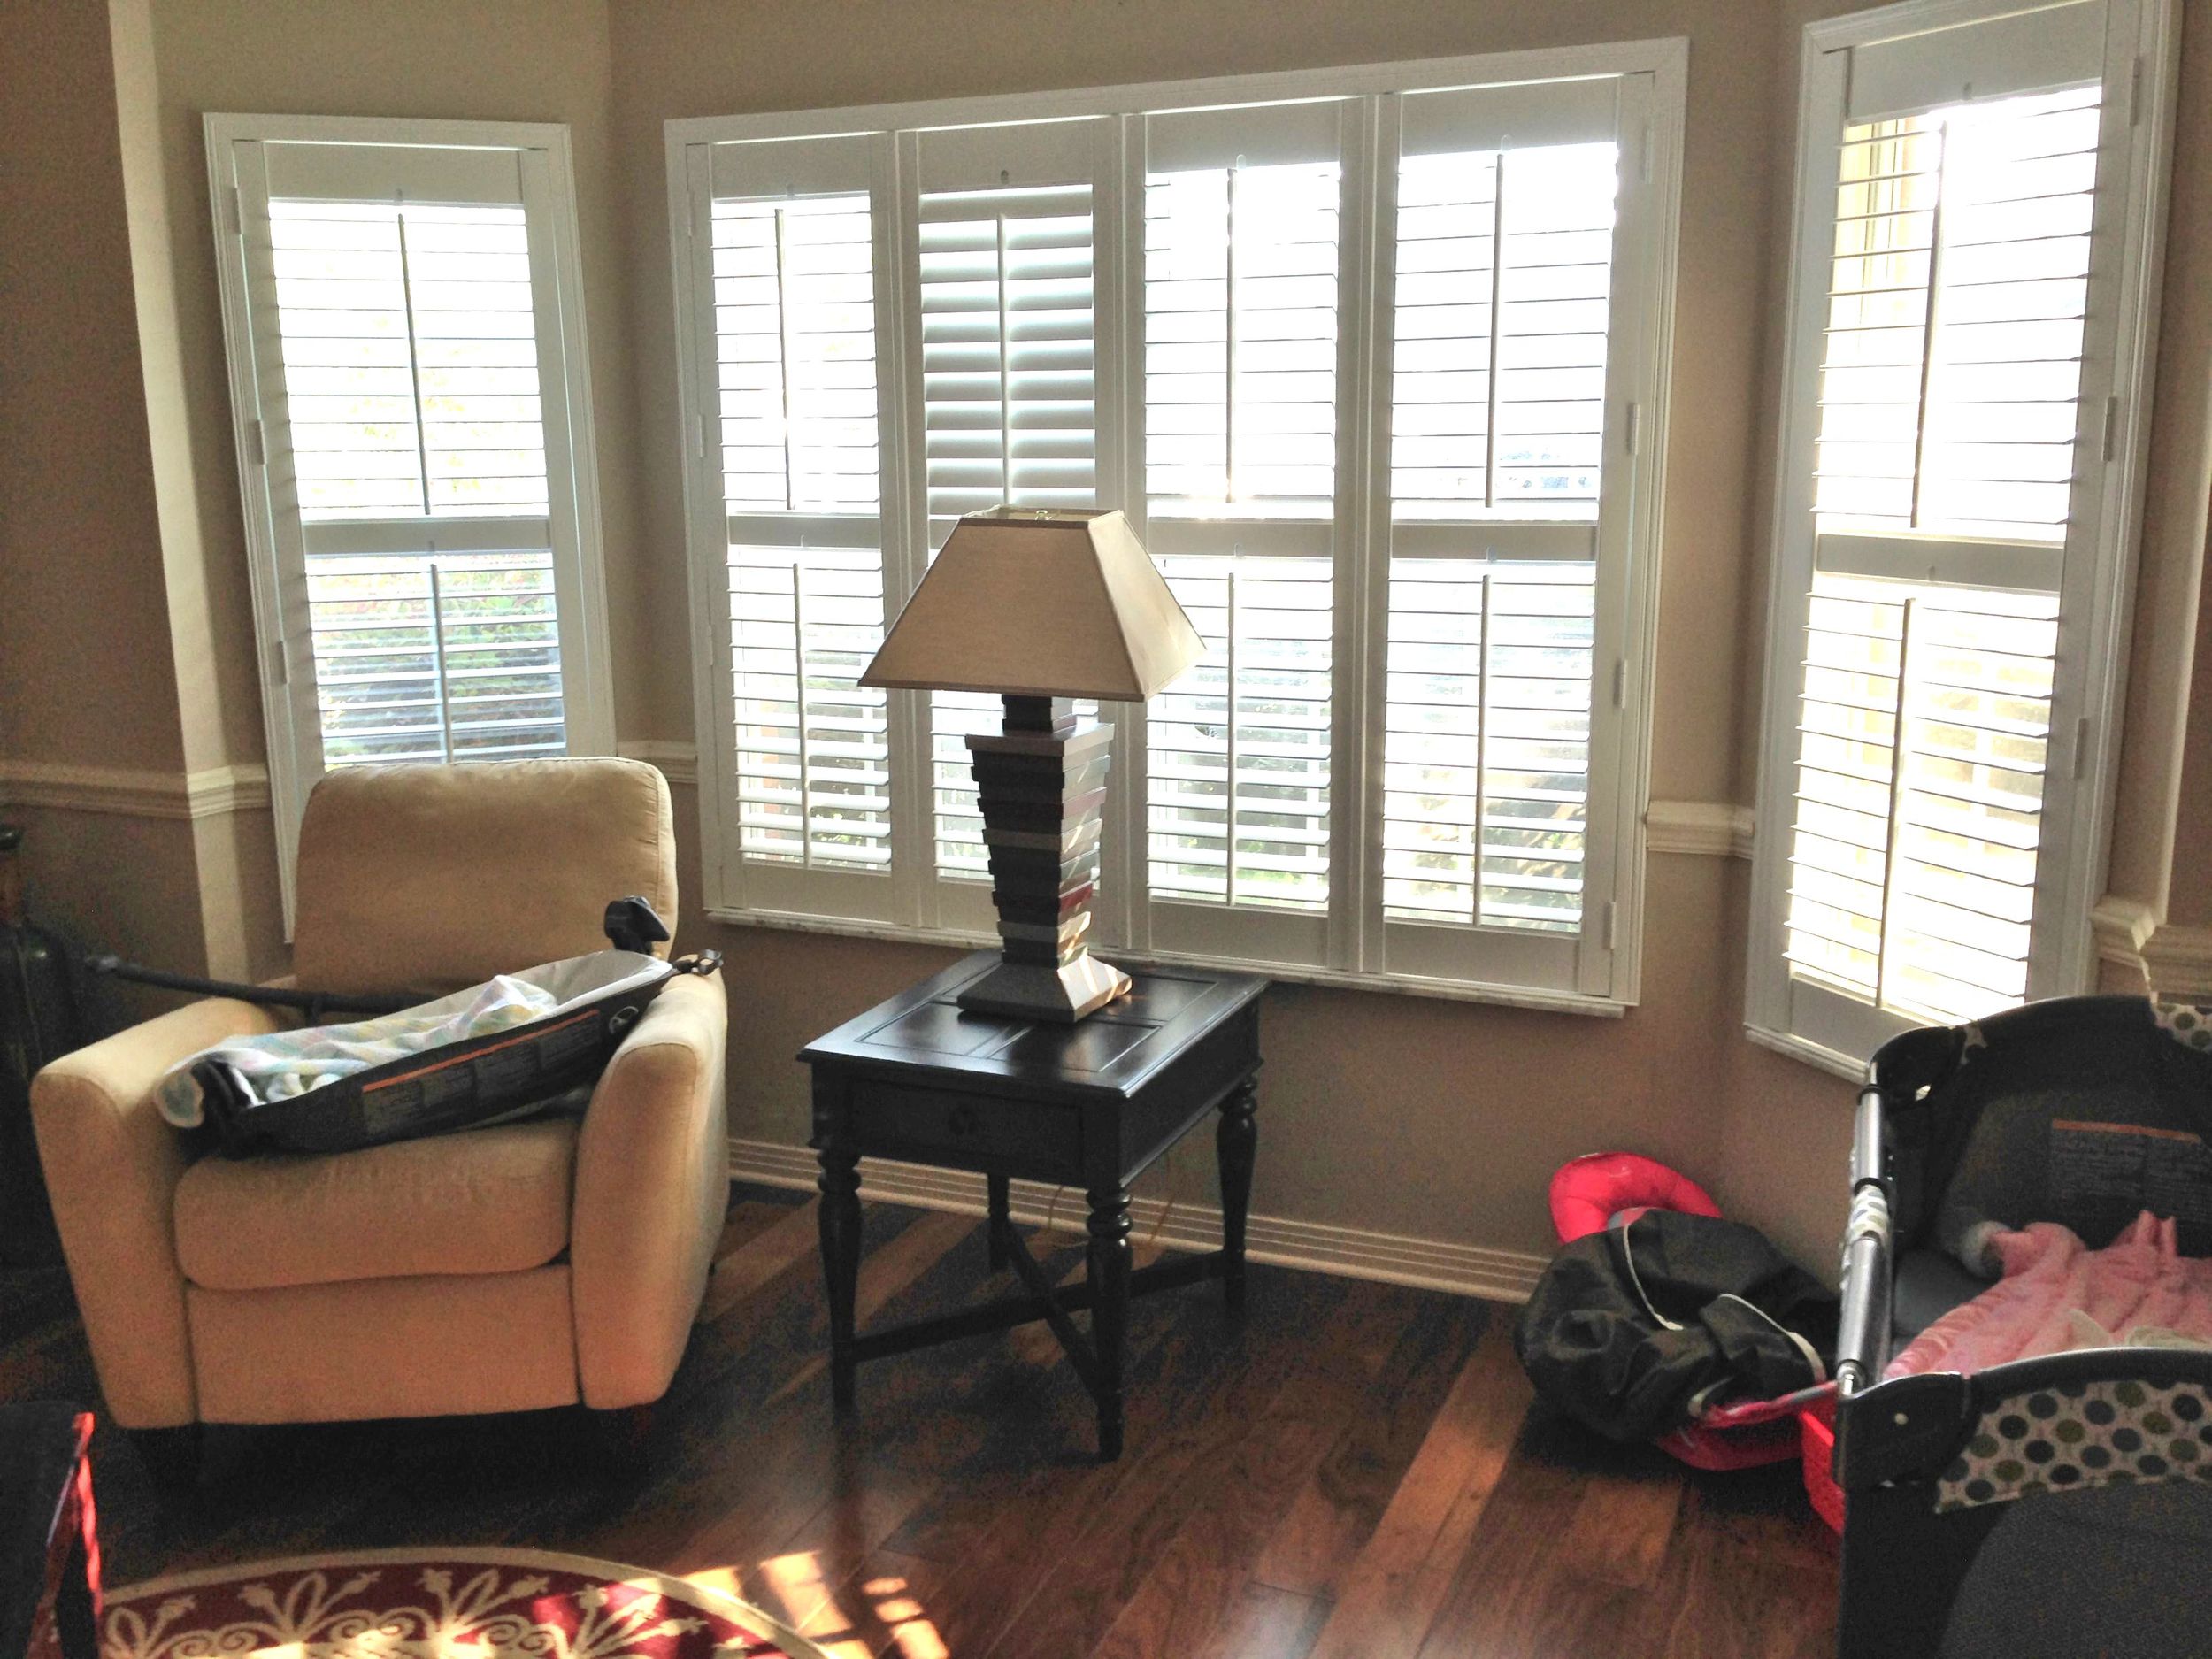
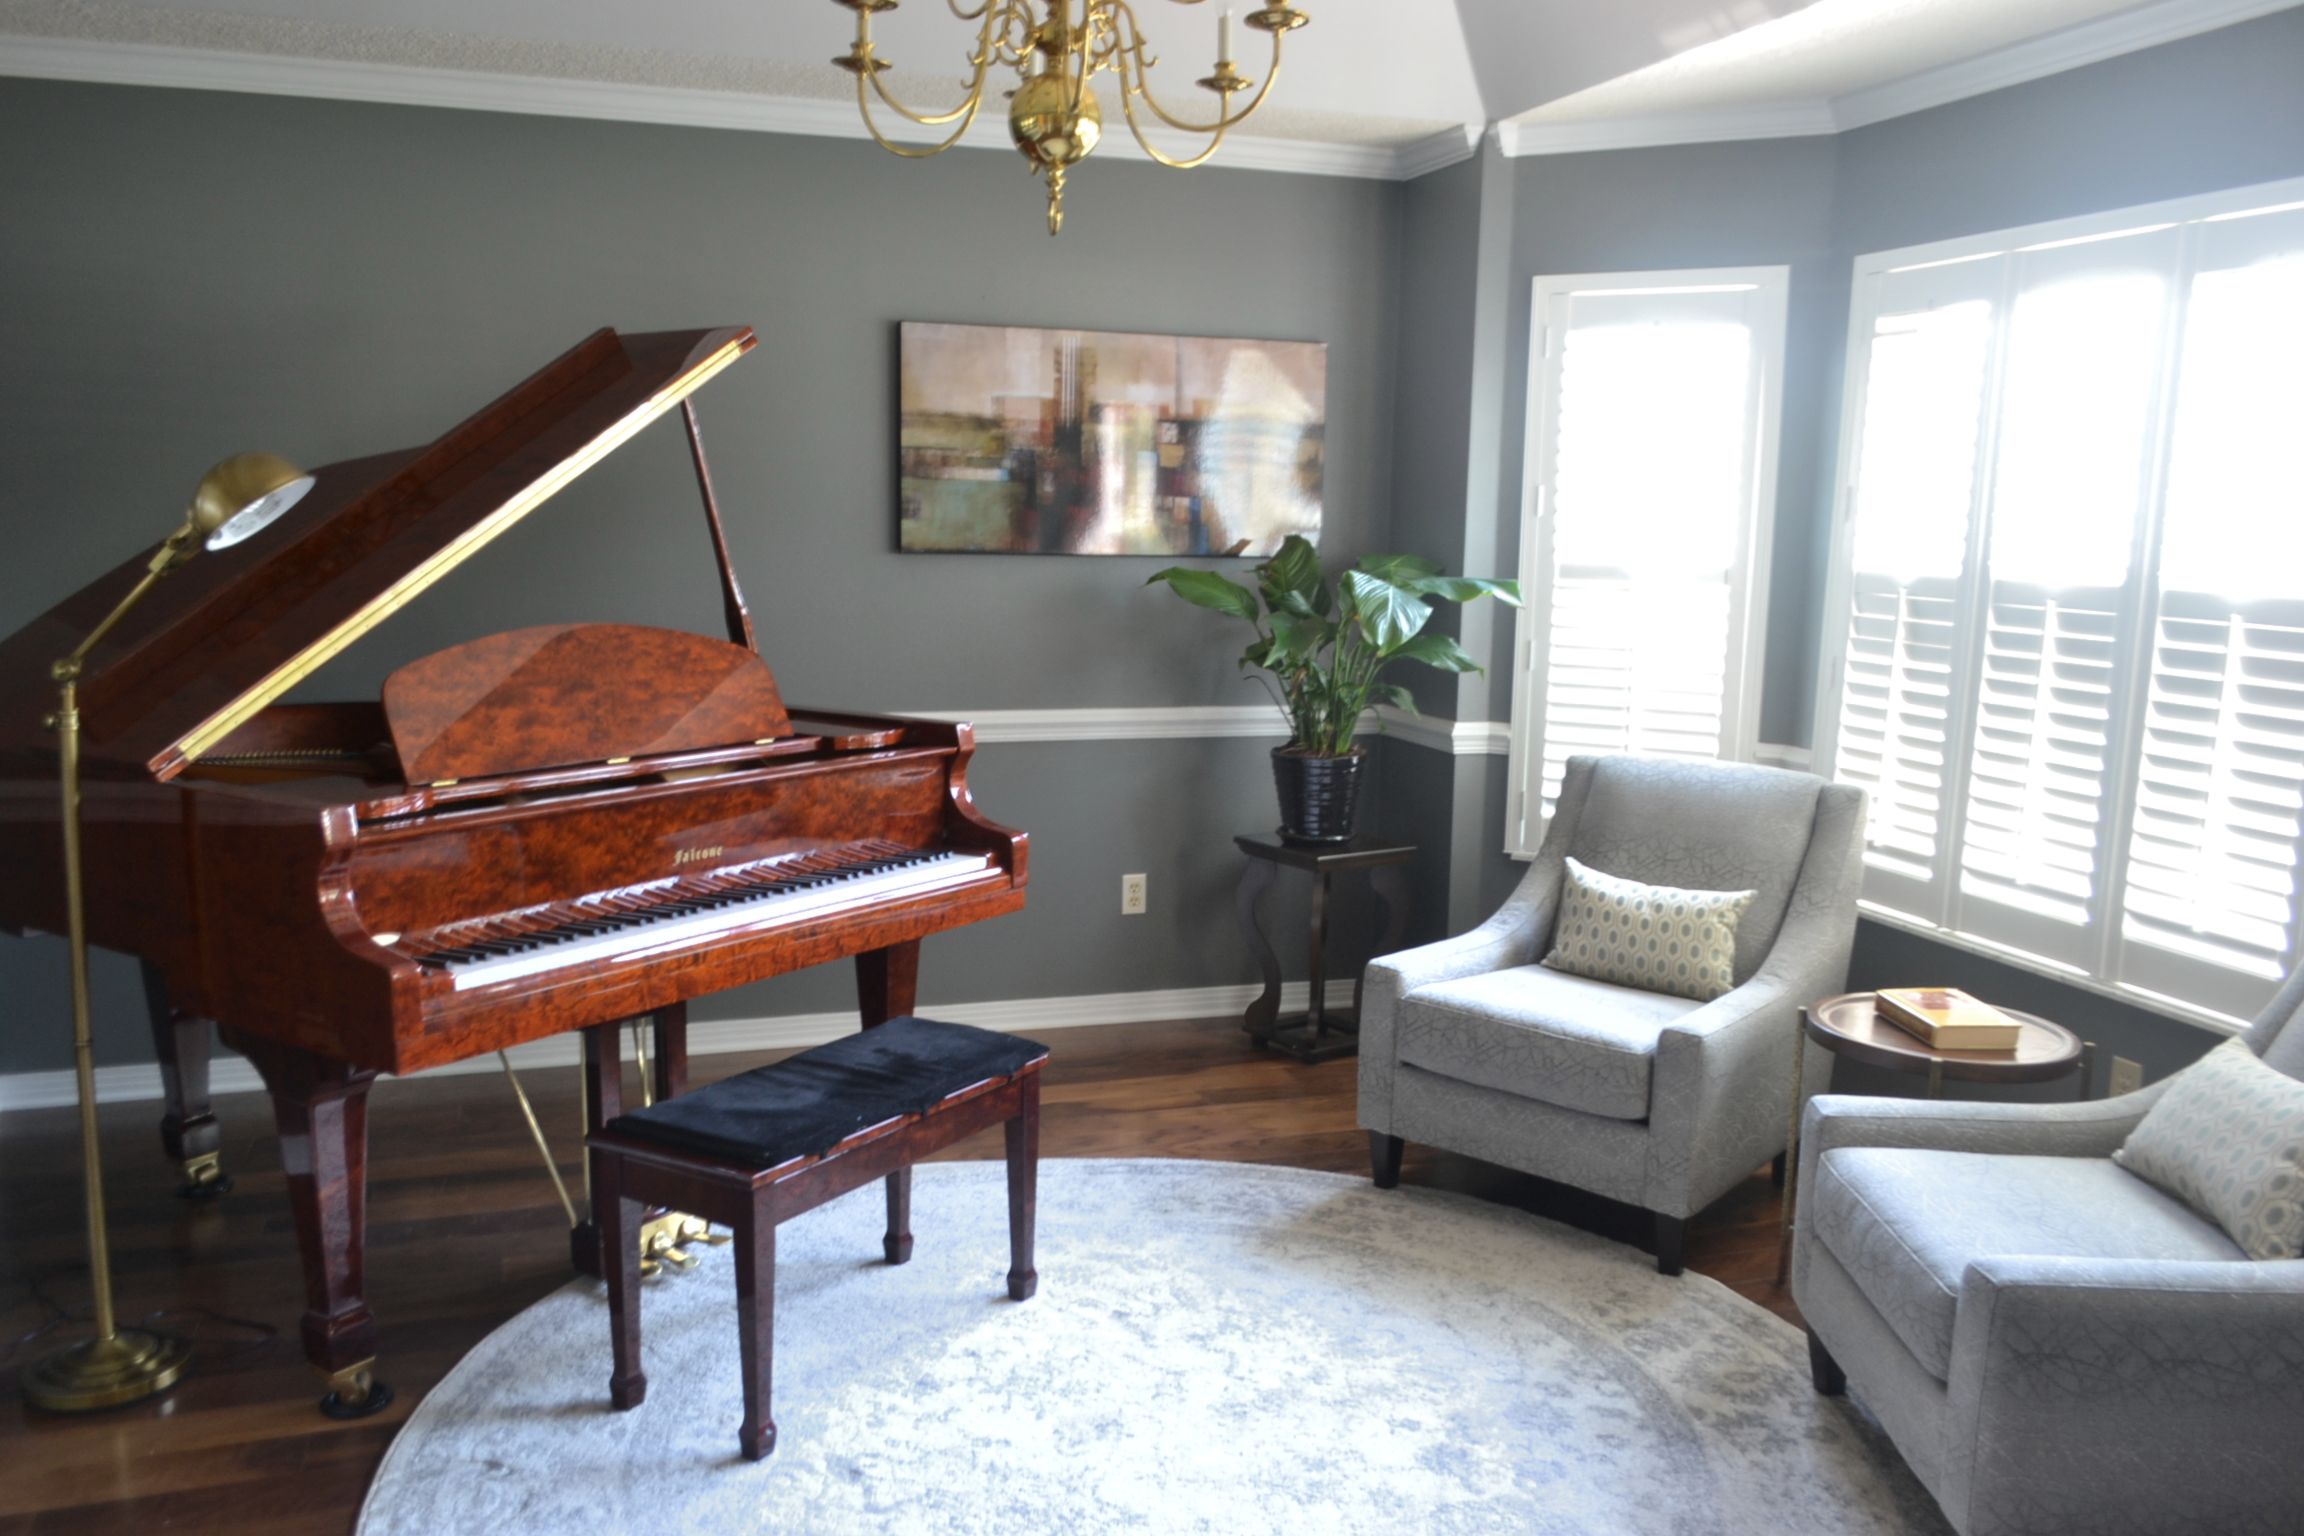
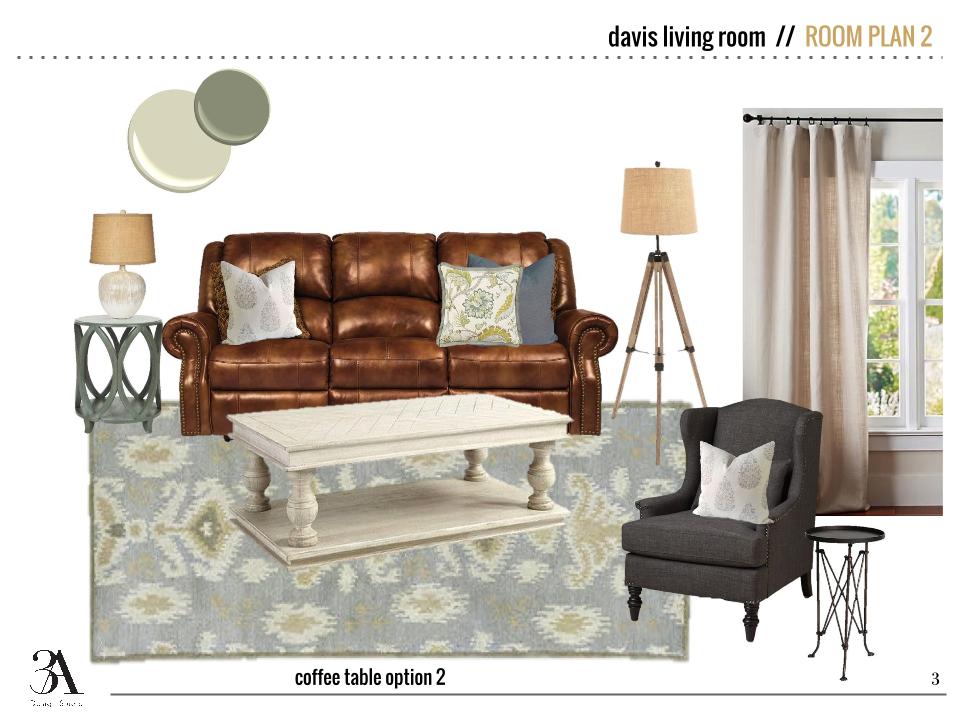
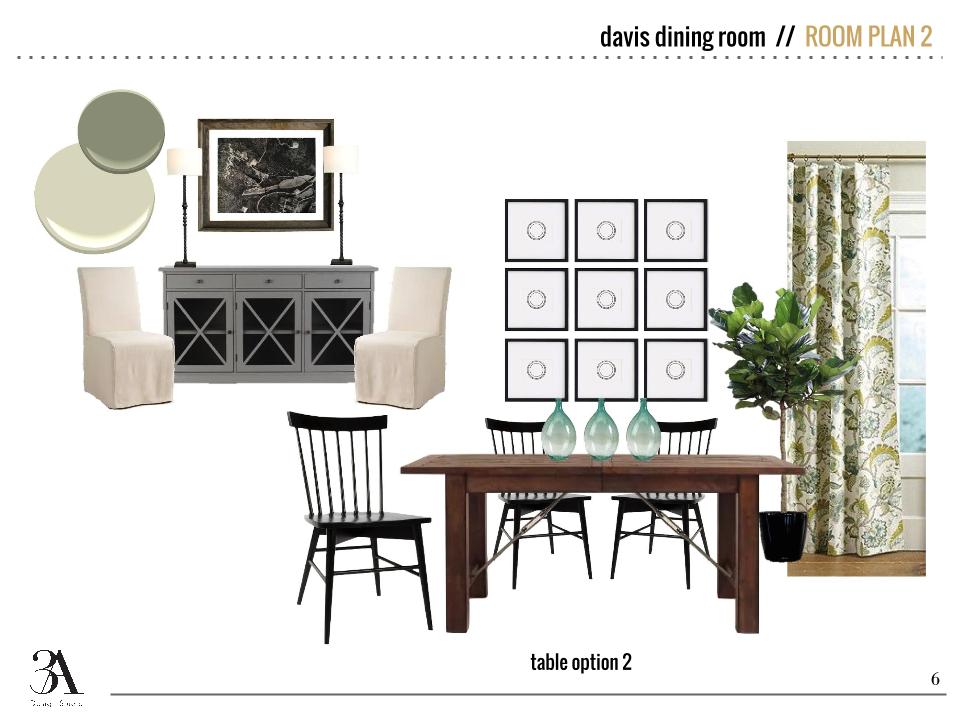
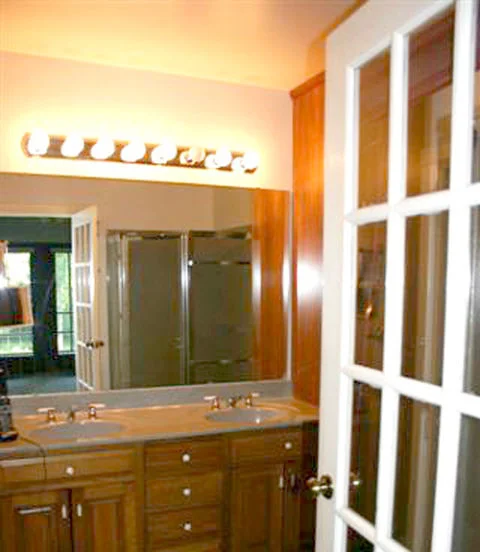
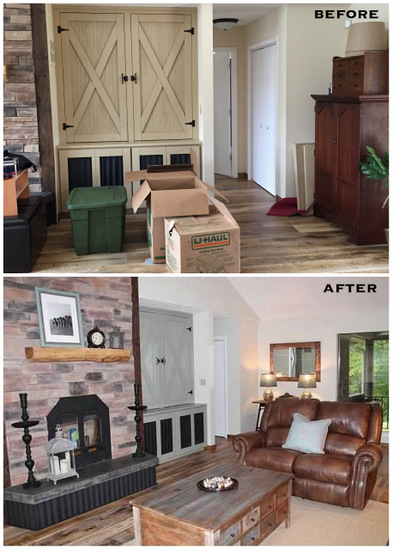
Here's a before/after comparison of the corner of the living room and front entry.  We suggested new paint colors for the walls and cabinets and outfitted the space with a new layout and pieces for the entry. 

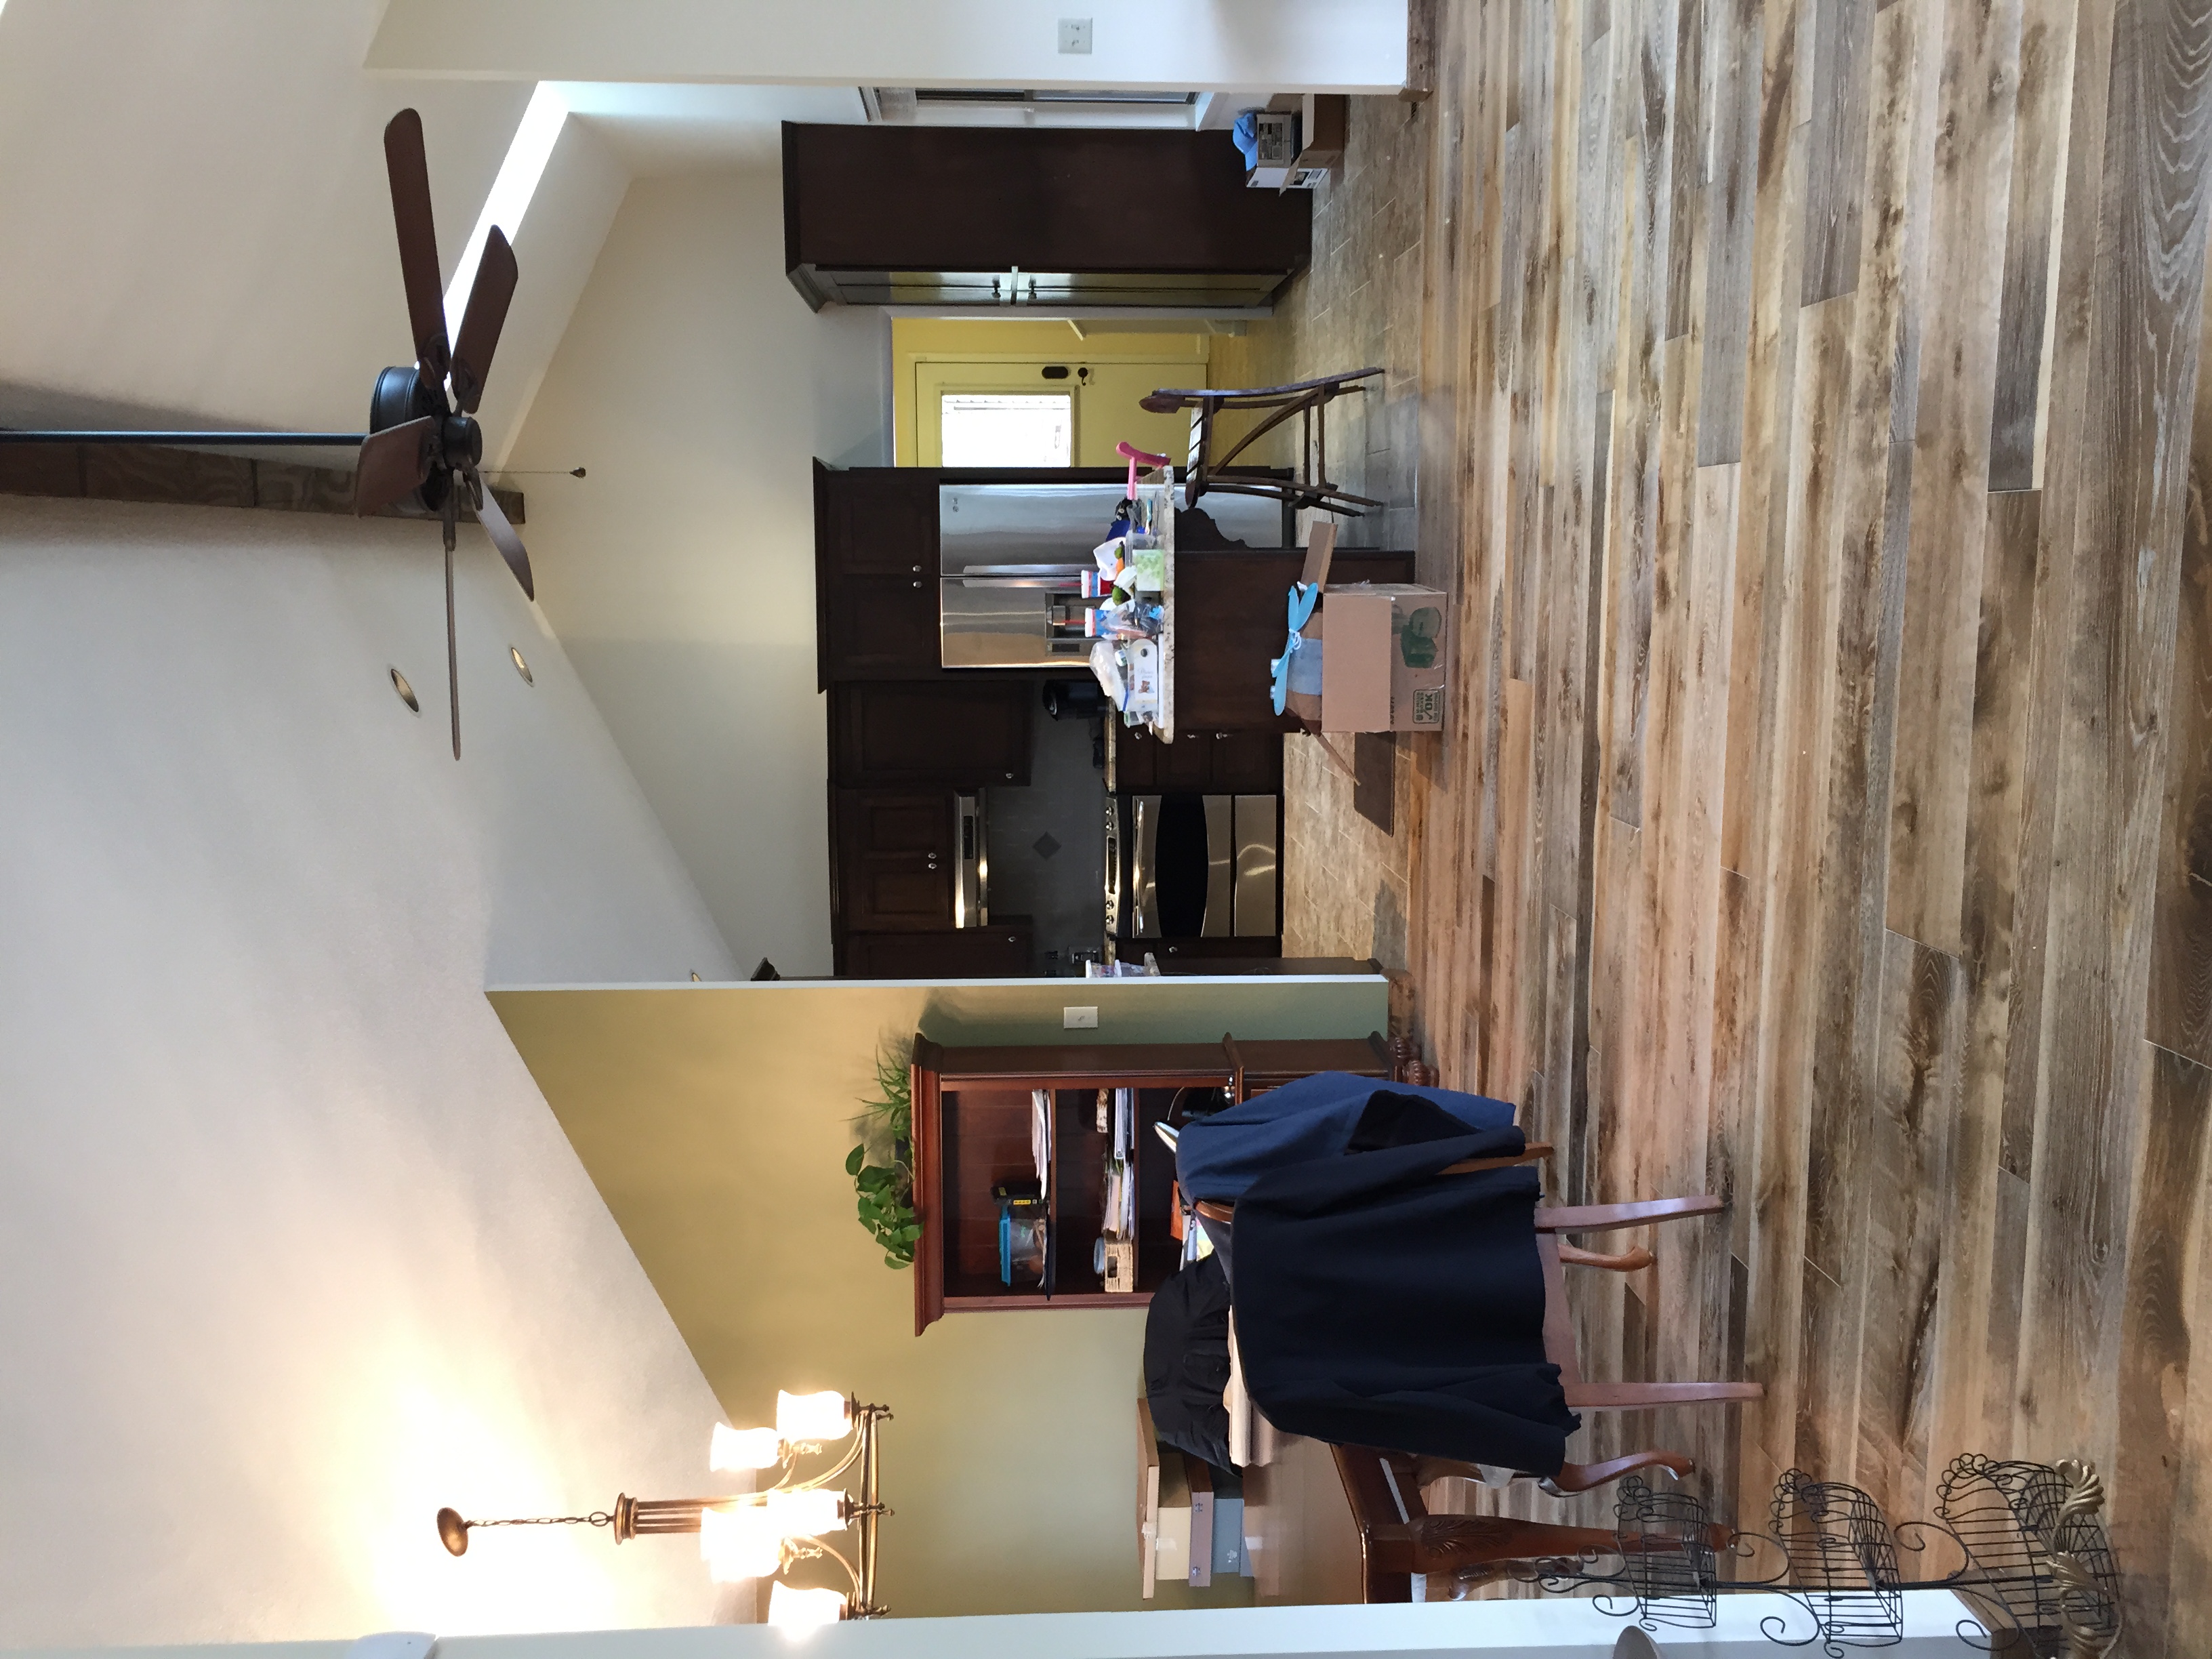
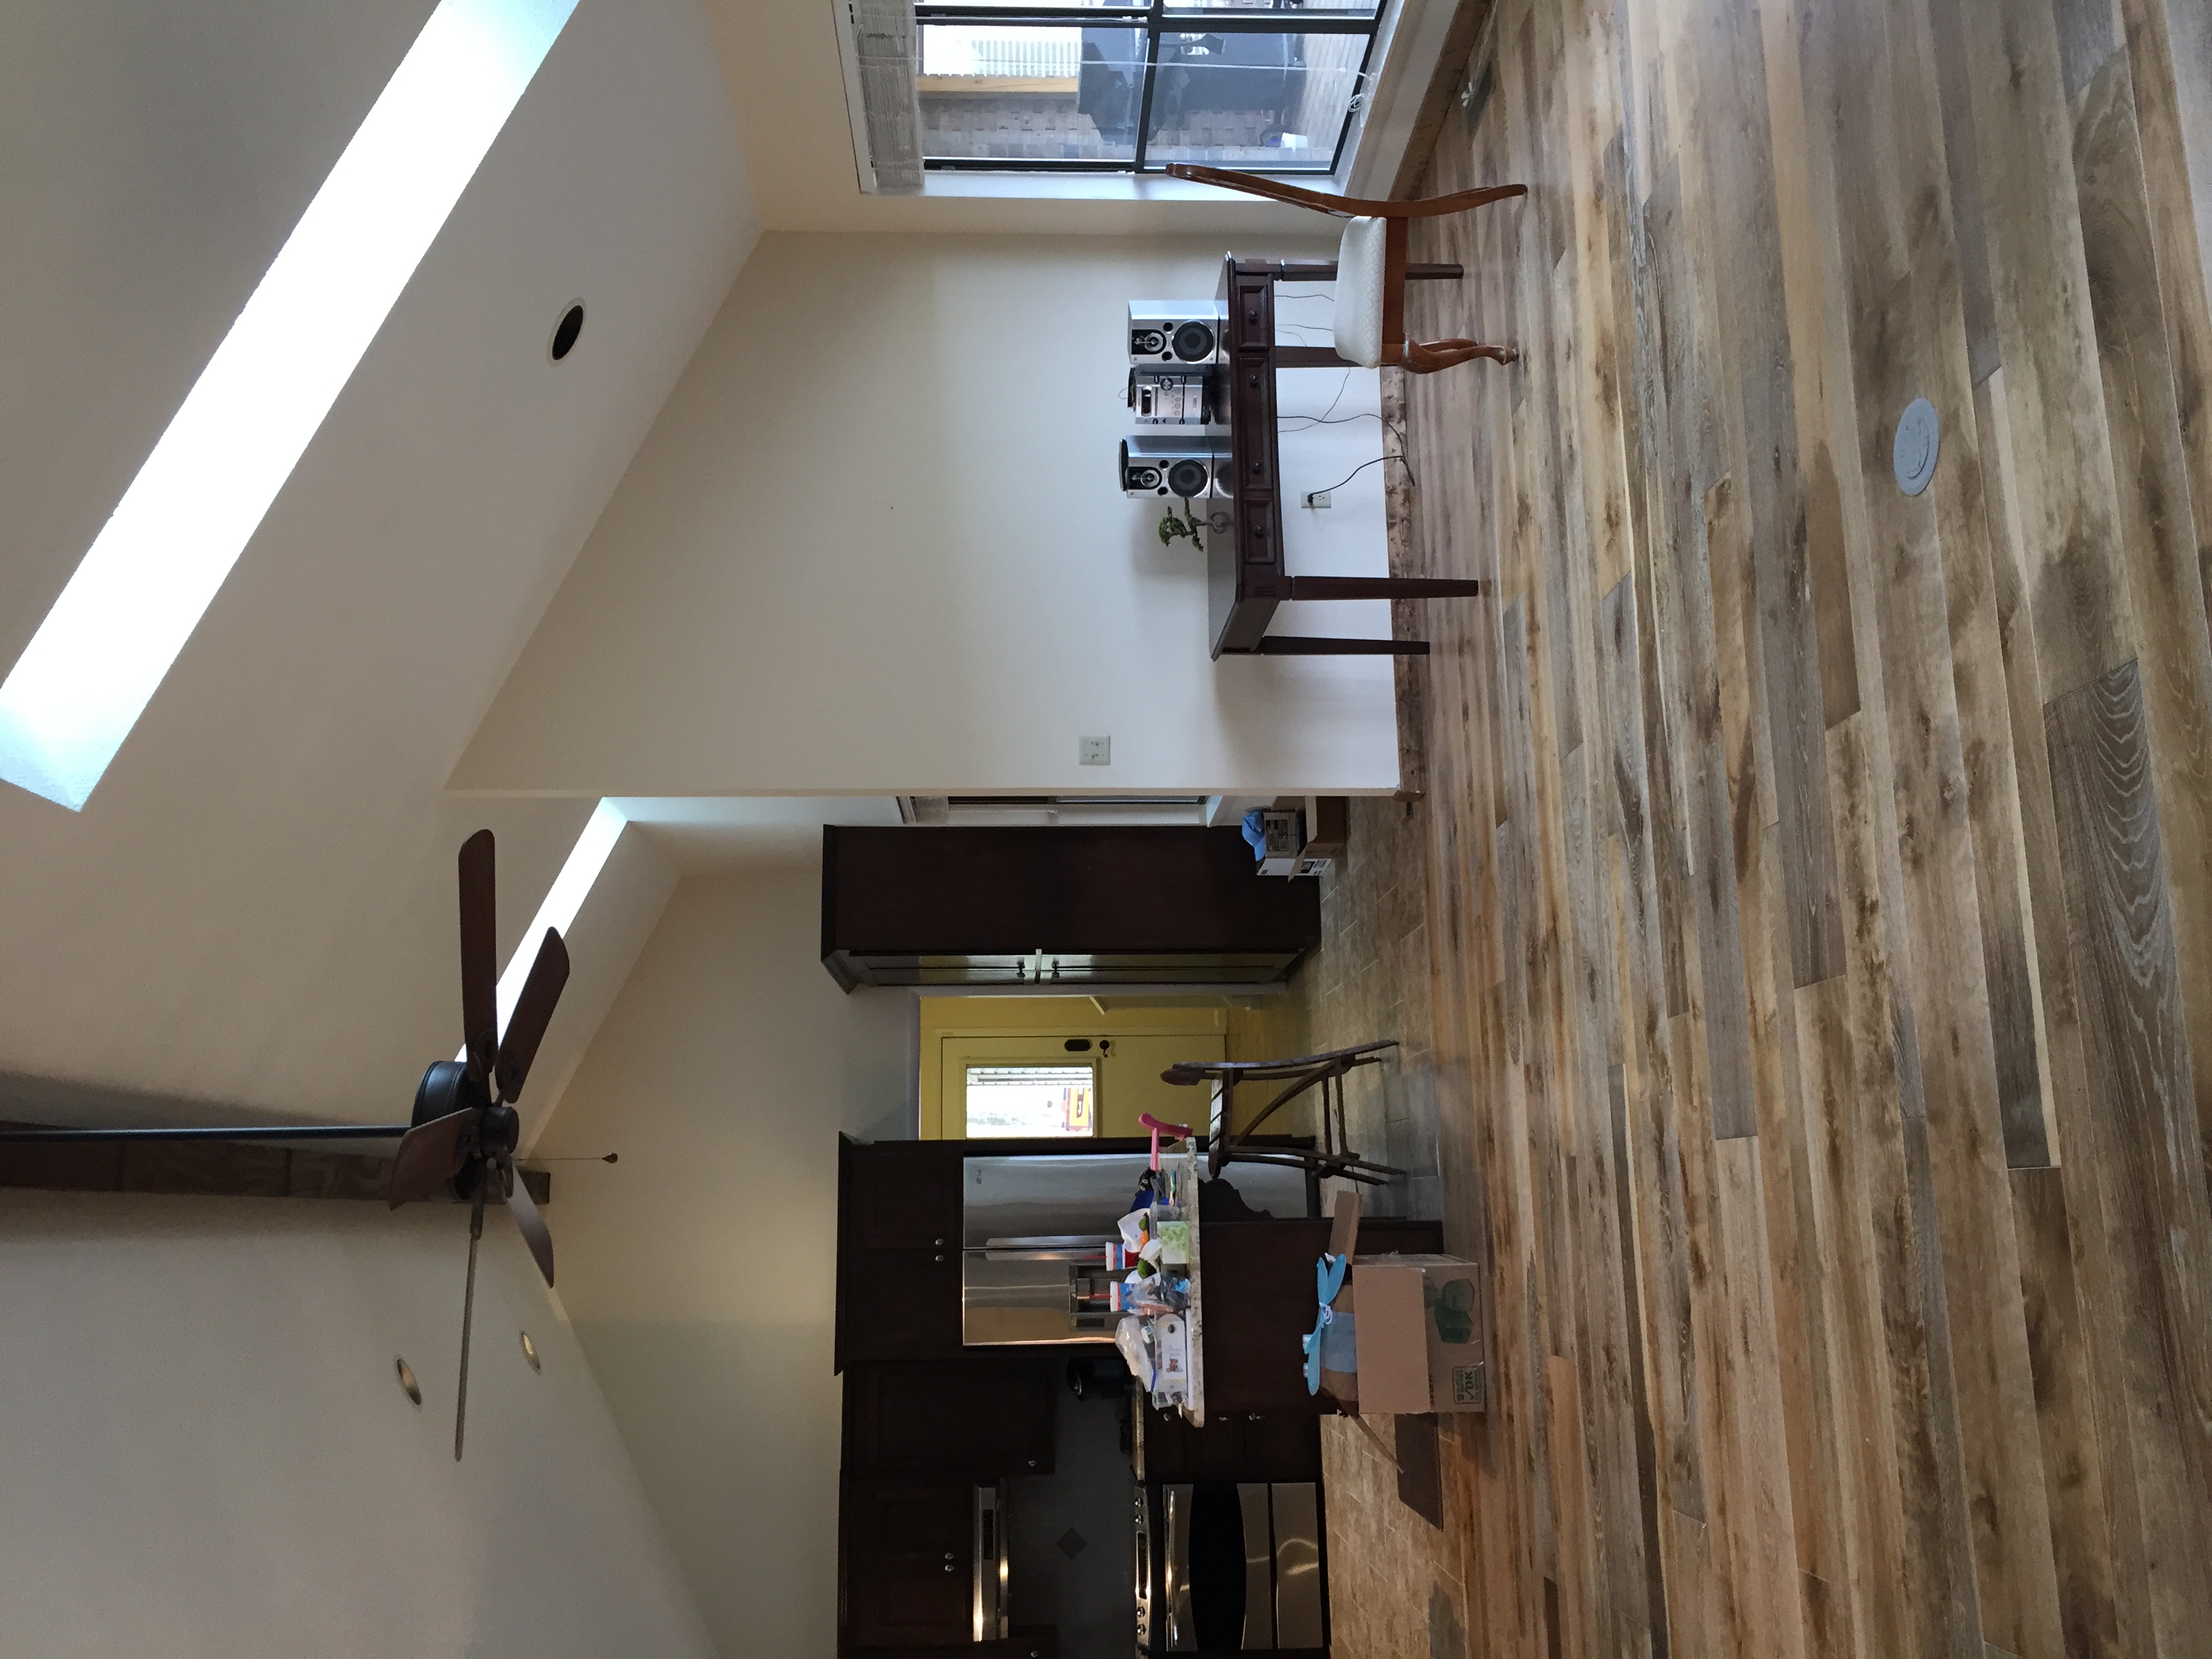
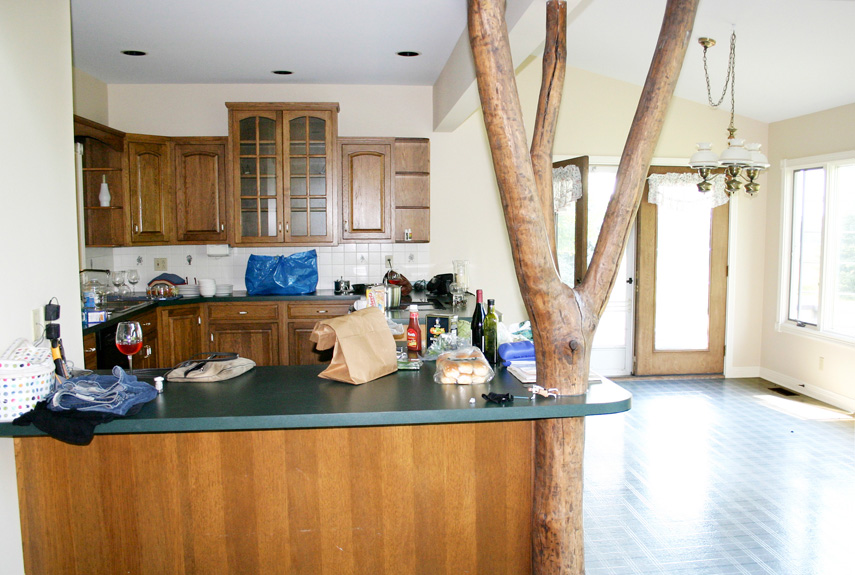
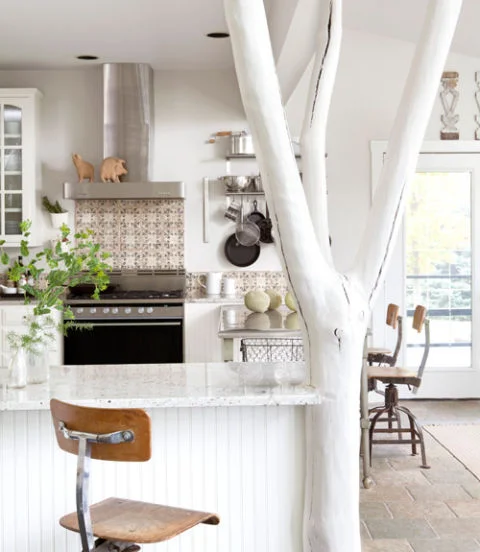
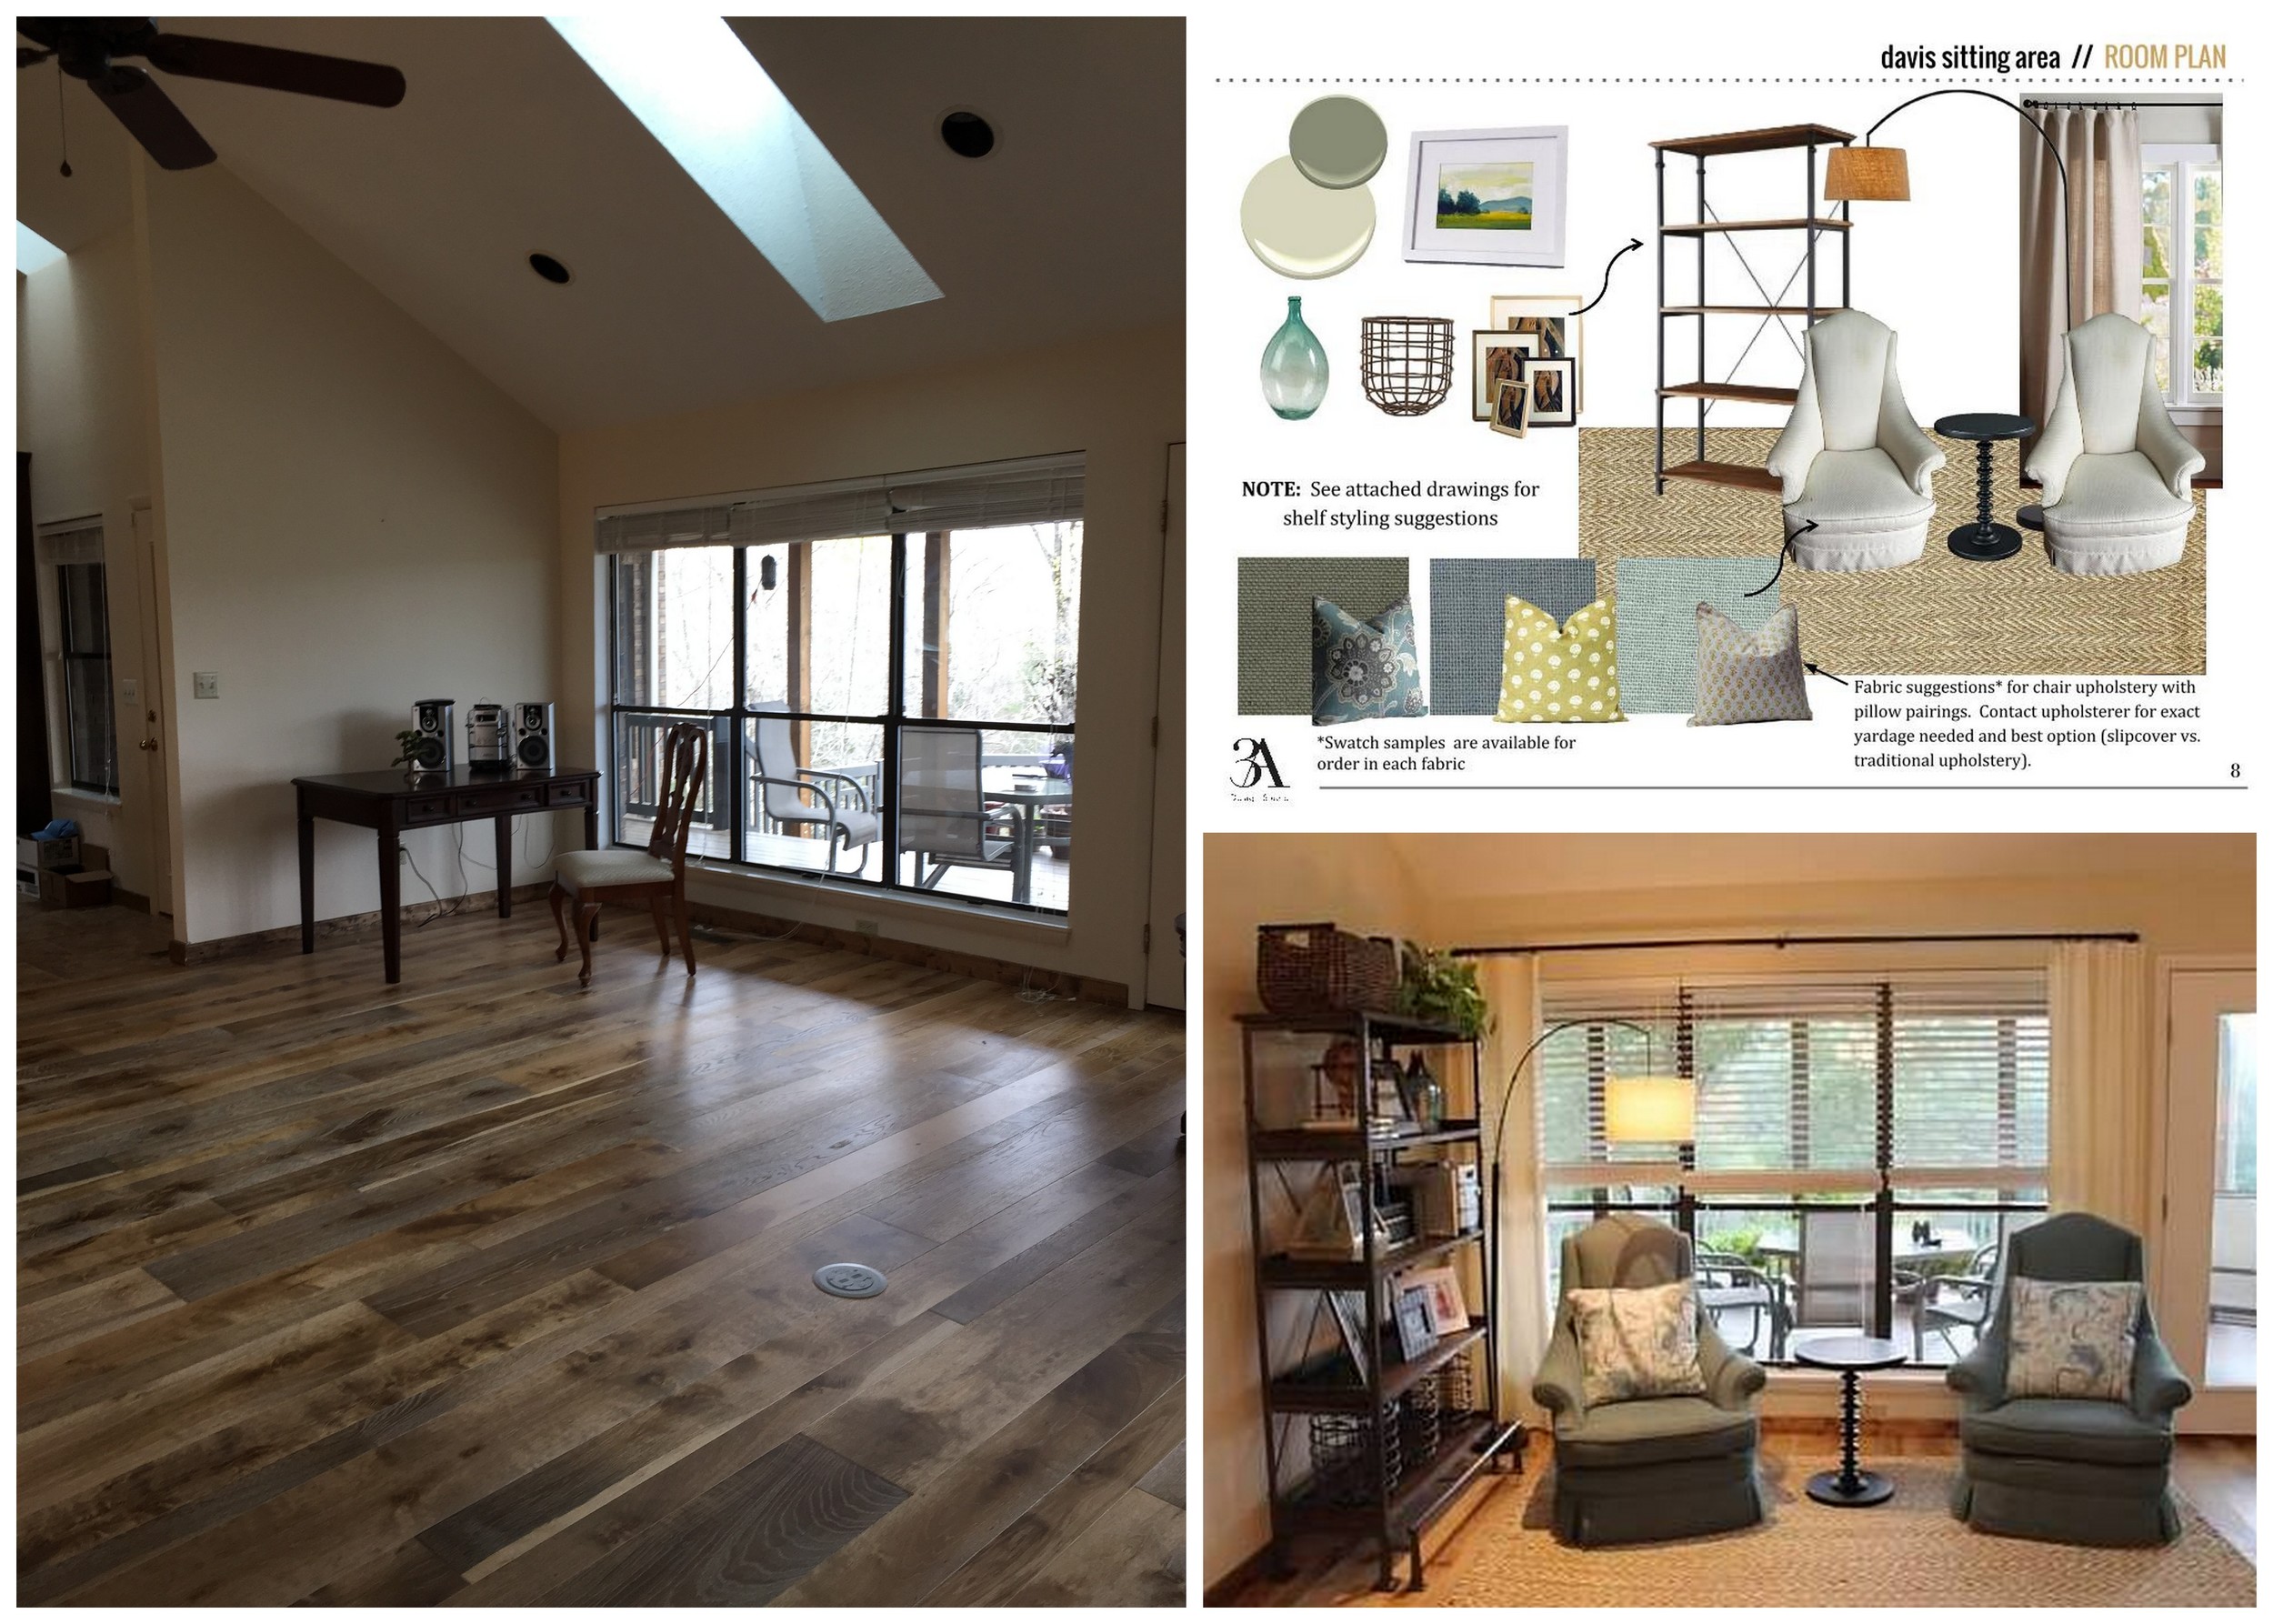
This before/after is of the previously "yet to be determined" corner of the great room when we first saw it, our suggested plans and the final result.  Pretty amazing, right?

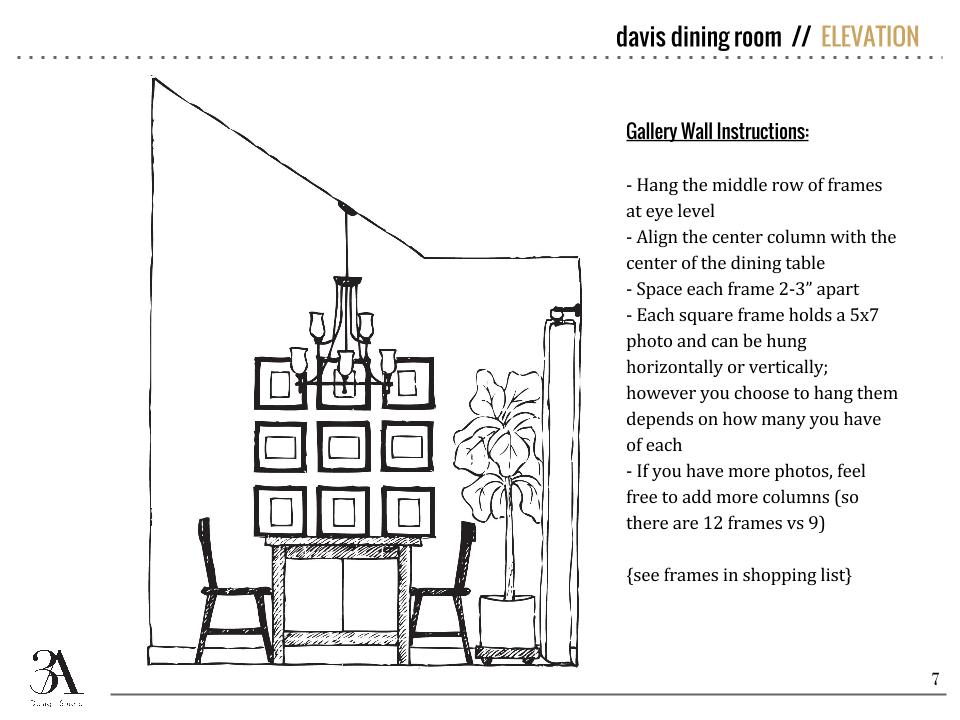
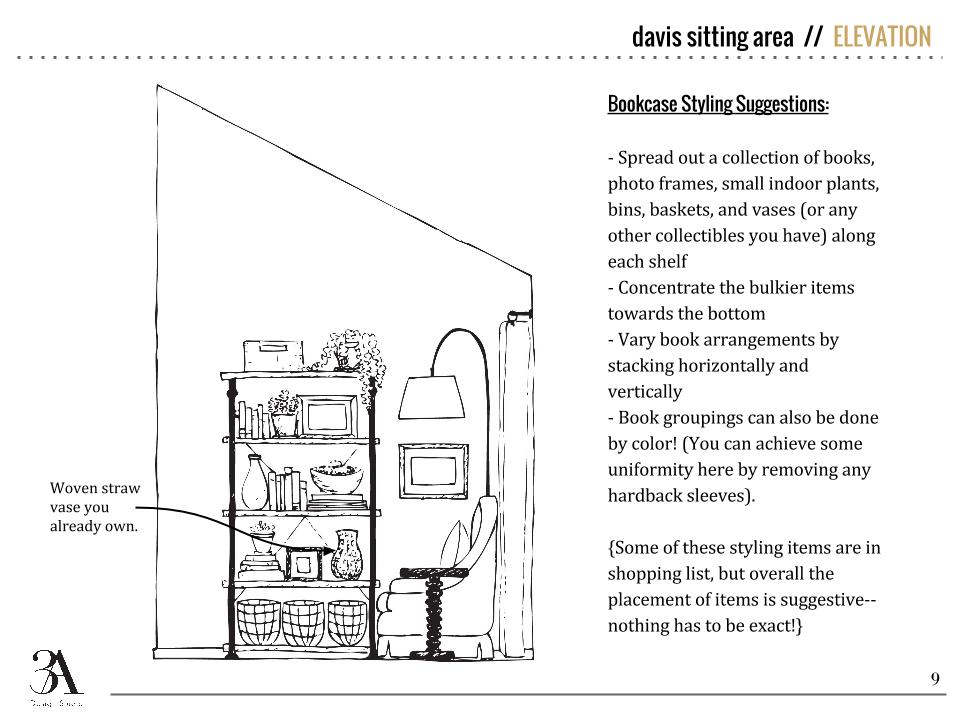
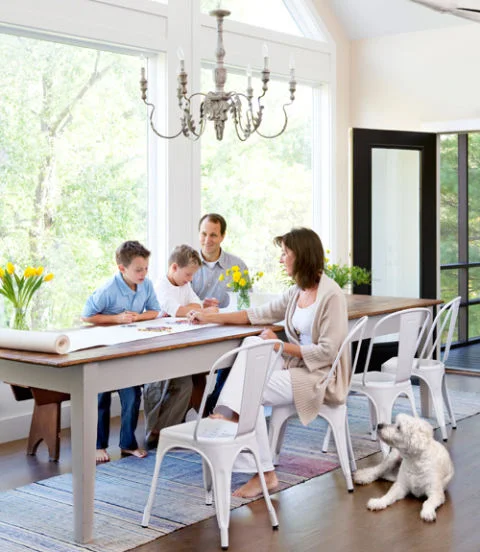
And here's one more comparison (because we can't get enough) showing the elevation concept we sent to the clients and the finished result.  

Our clients did an amazing job implementing everything, and we loved seeing our designs come to life!

If we can help you transform your space, contact us here or check out our E-Design page for more information. 

Before and after: Piano Room

Paint has the ability to really transform a space. Recently, we did a color consultation for a client's piano room. As you can see from the image below, they had a gorgeous piano but all the beige and red in the room did not allow the piano to take center stage like it should.

before

To balance the red in the piano, we chose grays with green undertones.  Sherwin Williams paint colors Cityscape and Passive were selected for the walls and trey ceiling. We also helped select a few accessories to pull the room together.

sw cityscape and passive

The wall color now acts as a dramatic backdrop for the piano to really shine.

DSC_1483.JPG

If you are having a hard time pulling the look of your room together, drop us a line. We'd love to help!

Client Project - A Farmhouse E-Design

We wrapped up a huge great room design in a beautiful Alabama farmhouse last month and have been dying to share it with you guys.  Dana previewed a little tease of it here, but today we’re showing you the rest.

Our sweet clients had just moved into their new home a couple of weeks before we went for the consultation.  We had seen some photos of the house through email but we couldn’t really get a grasp of its openness and amazing views of their man-made lake and 3 acres below.

Look at that view.  (pardon the boxes and such...they had just moved in)

View standing in the living room and looking back into the kitchen.  Don't you just love all of the openness?

Our clients told us they liked cool, soothing colors and wanted a design that would work with the aesthetic of the farmhouse and also be comfortable and durable for their young family.

We got to work by first selecting new paint colors for the walls and built-ins and then sent over some sofa options.  Due to a long wait time on a custom sofa, the clients ultimately had to select one in town that fit their needs.  We still got to “go shopping” with them virtually and added their newly selected sofa and loveseat to the design foundation.  As you can see below, we also presented them with a couple of options for a coffee table as well.

The entry is right off of the living room so we brought some of the rustic elements and the same color palette to this side of the room.

n the dining room we suggested all new furniture to tie in with the rest of the space.  We chose more colorful window treatments and accessories to bring some life to this side of the room.

We love supplying our clients with not only mood boards and items suggestions but also elevations so they can actually visualize the scale and look of the new pieces in the space.

Directly across from the dining room was an unassigned space where we created a seating area.  The clients had some slipper chairs that they wanted to recover so we supplied fabric and pillow options to complete the look.

BEFORE

BEFORE

Aside from the large great room, we also supplied tile backsplash ideas for the kitchen to be used at a later date and included some suggestions for finishing off their master bedroom. They need bedding suggestions to match their existing duvet and a remedy for covering a mid-height wall outlet.

It was so great to work in a home where we could really tie each room together and supply the homeowners with a look they’ve been hoping to achieve.  We’ve already seen a couple of the progress pictures and can’t wait to see the finished product!

If we can help you finish off a troublesome space (or spaces), please let us know!  Whether it's a few styling suggestions and paint colors or a newly designed room, we can help.  Go here and fill out our design questionnaire at the bottom of the page to begin.

Backyard Update II

As I mentioned a few posts back, we are re-doing our backyard. We have a good size yard but it was very shady and the mosquitoes would eat us a live within a minute of being out there so, we hardly went out.  We also had a water drainage issue from the yard being so un-leveled, no grass, and the fence was falling apart. Here is what is looked like before.

backyardbefore3a.jpg
beforebackyard3a

The yard really opened up by cutting down a tree, moving a couple trees back near the fence , and removing the small side fence that the previous owners installed. A newly installed patio also made a big difference.

And here is what it looks like today.

3apatio3

A good pressure washing to the fence did wonders.

My golf loving hubby and my brother installed a small putting green where the playground used to be. If you are interested in creating one, these are the instructions we followed.

homeputtinggreen

Though we are not quite done, it has been so nice to finally enjoy our backyard. My daughter and her friends have played soccer in the grass a few times. Our nephews have had fun on the putting green. The baby and I have been able to sit out on the back and get some morning sun. We have even had dinner on the patio and surprisingly the mosquitoes haven't been bad. I am not sure if its just because it is early in the season or if having less shade in the backyard has helped cut down on the mosquitoes. We shall see.

3apatio2

The next steps are putting up a hammock I bought a few years back, installing plants, and building a fireplace.  I will continue to update you as we progress. If interested, below are links to the cushions and dining set I bought, along with a few other items I plan to purchase to finish off the look.

hammock // cushions // table & benches // white stool // umbrella // aqua pillows // floral pillow // tray

Until next time, lovelies.


Before and After : Tree House

Located in Michigan, this home belongs to a couple and their two young boys who were looking for the perfect vacation home. The previous owner was an arborist and left a few design challenges for the new owners. As you will see, this before and after is a good example of how a can of paint can transform a space.

The home's exterior was lightened up using Benjamin Moore's Grant Beige.

exterior-after-xln.jpg
livingroom before.jpg

The living room was very rustic and had wall to wall forest green carpet.

livingroomafter.jpg

The carpet was ripped out and to help unify all the different materials, everything was painted white.  Both the fireplace and mantle were painted White Dove by Benjamin Moore. When in doubt, paint it white.

kitchen before.jpg

The owners had planned to remove the vertical beam that was made to look like a tree growing out of the floor, but it is was determined they couldn't because it was structural.

So, they painted it white along with the cabinets. Surprisingly, the kitchen turned out very beautiful. The tree along with the backsplash tile and stone countertops  gives it a sophisticated organic quality.

dining-room-before-0910-xln.jpg

The dining room before.

After.

bathroombefore.jpg

The dated master bath got an overhaul. Instead of replacing the awkward French doors, they improved them by replacing the glass with mirror.

bathroomafter.jpg

Job well done. To check out more, visit House Beautiful for the full article.