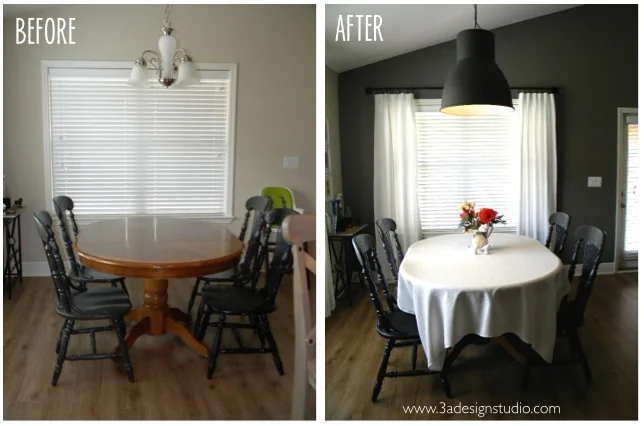
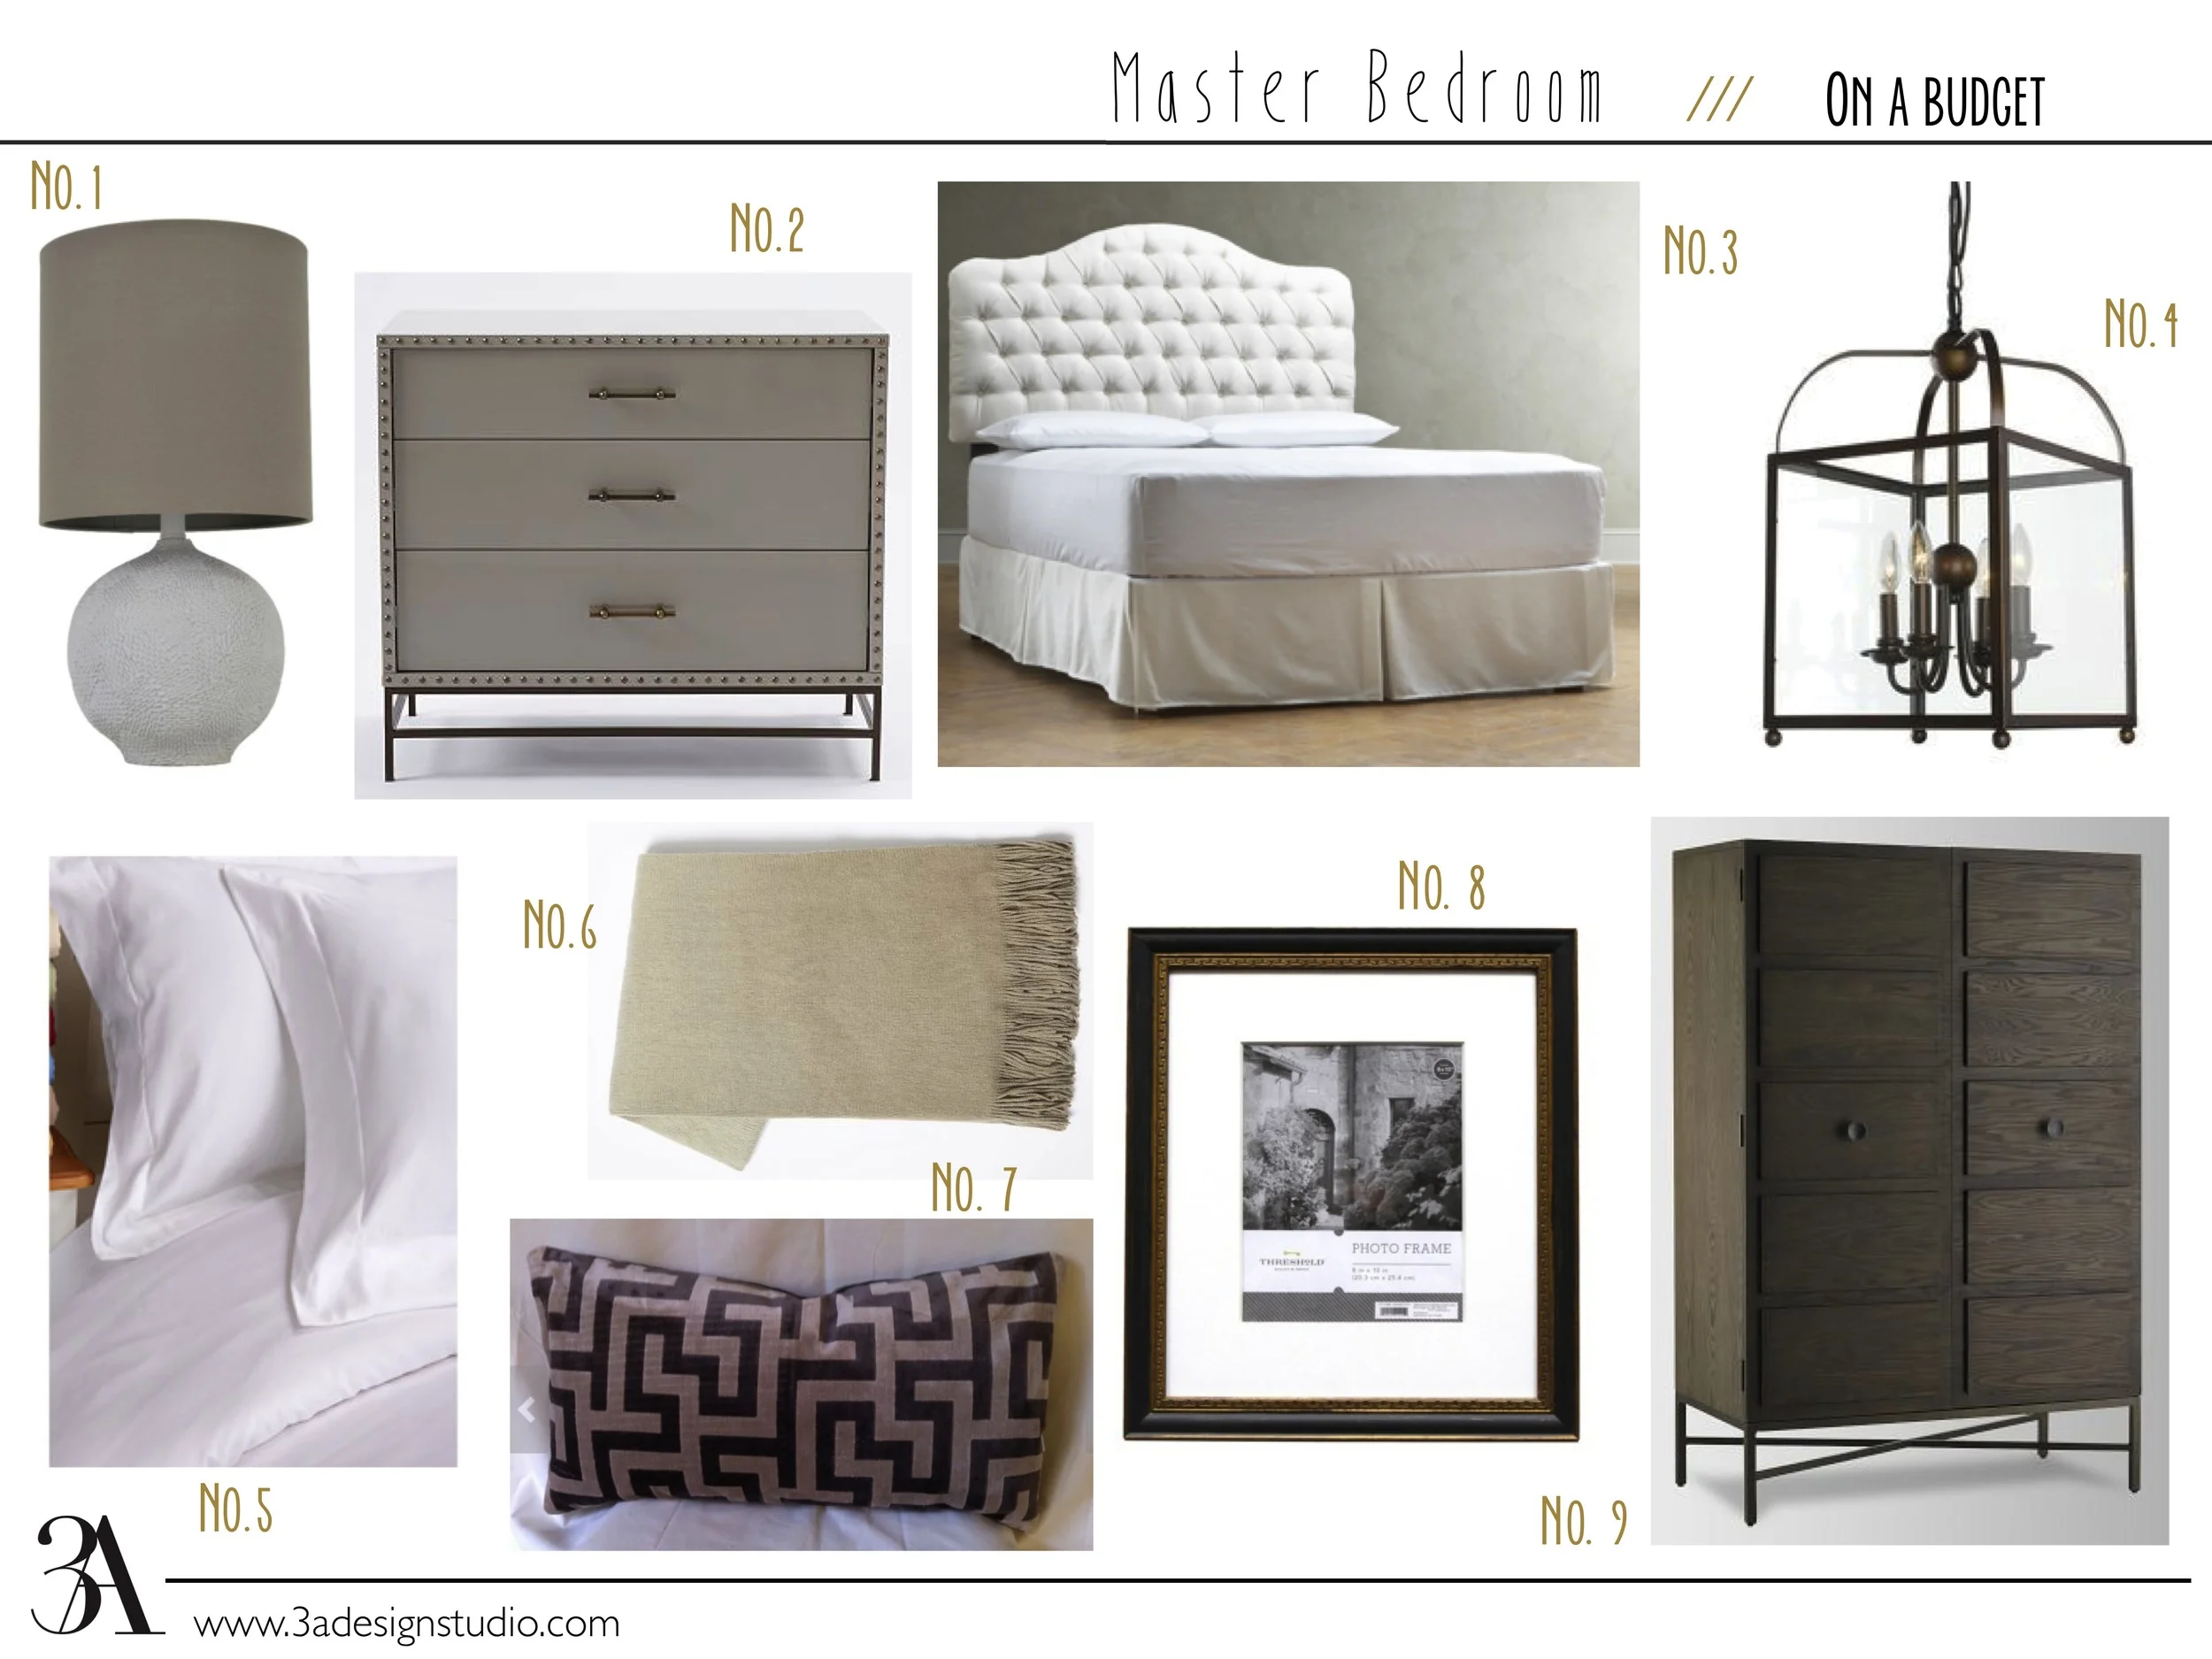
A Dinner Story -with Serena & Lily
/I've long been a fan of Serena & Lily. They have a wide range of great items: furniture, wallpaper, baby goods, accessories... you name it. And they also have great sales. And y'all know I'm always looking for a good sale.
This week while I was perusing their sale items (that are currently an EXTRA 20% off with the code SALE20 until April 21st), I became inspired by several of the items and thought "Oooh I could make a great dinner party out of these finds!" And since I love sharing a good deal, I had to share with you guys! Everything* listed below is on sale with the exception of the pillow, but it was too good to not include! Tip: Adding throw pillows to the head chairs at the table is great way to bring color and texture to any dinner party.
*All items are from Serena & Lily except the drinking glasses and all prices listed are BEFORE the extra 20% off.
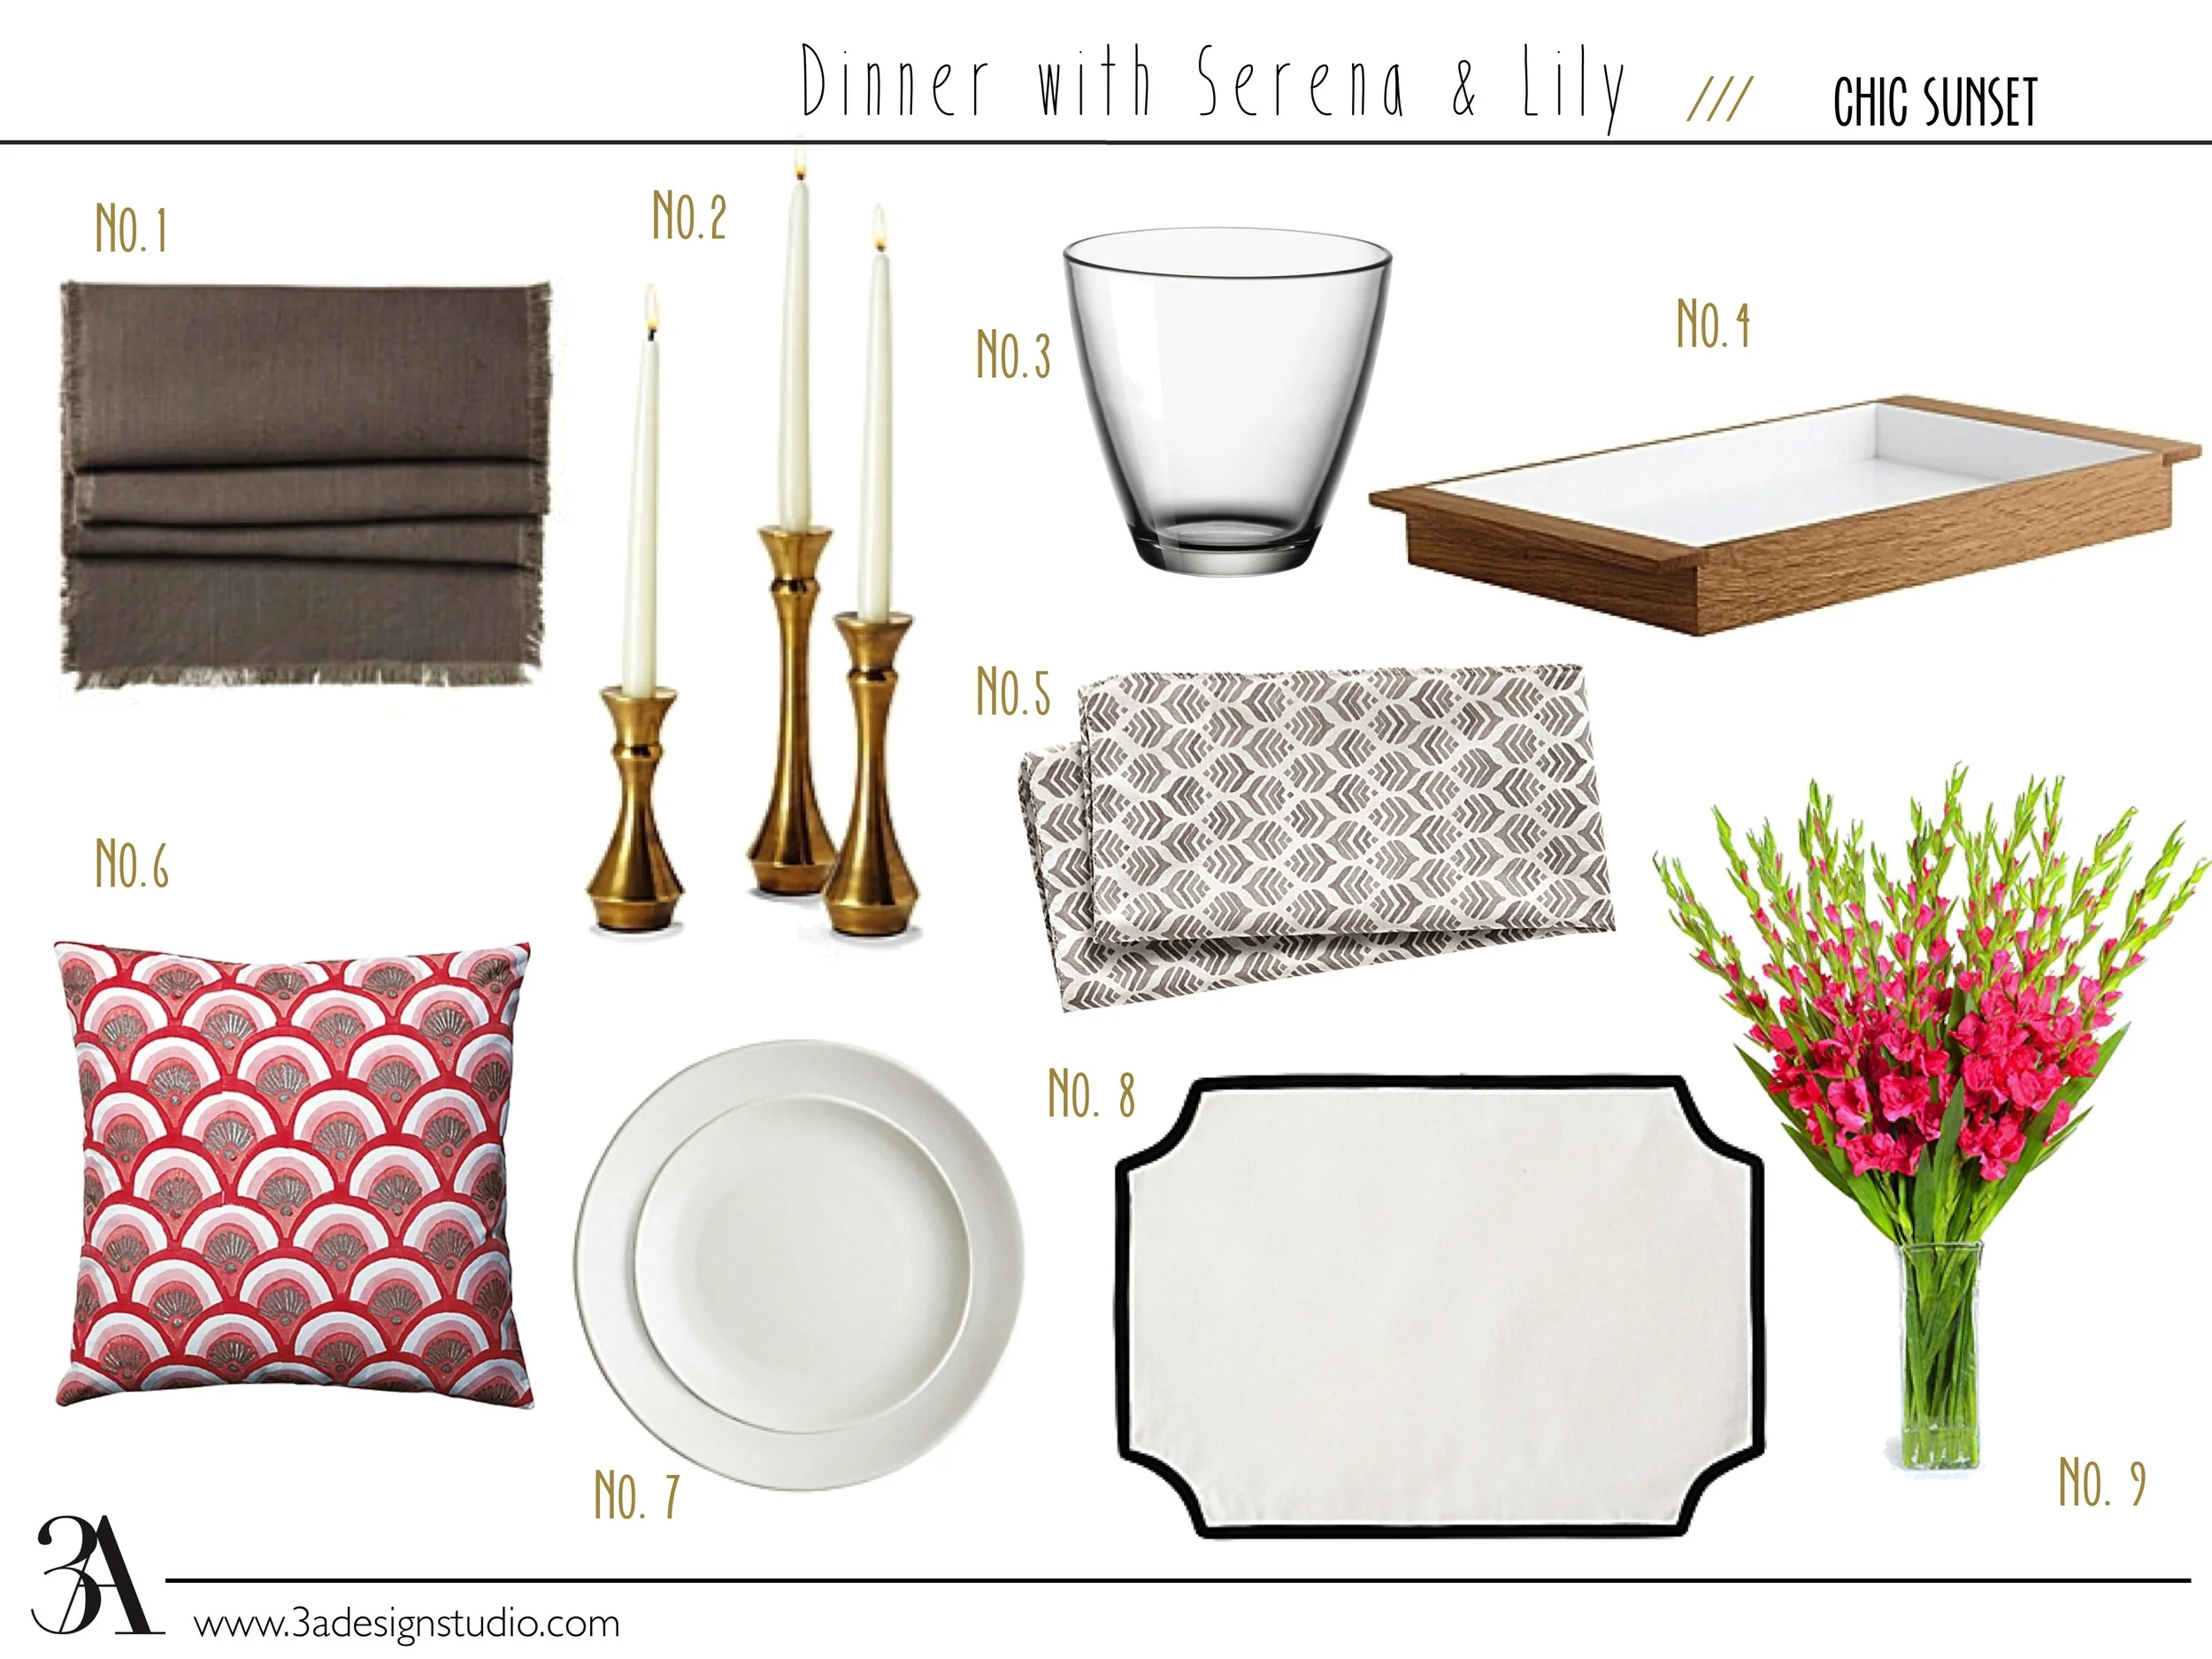
1 Table Runner -68.00, now 21.99 /// 2 Brass Candlesticks -32.00-38.00, now 10.99-14.99 /// 3 Water Glasses (set of 12) -16.80 /// 4 Wood and Lacquer Tray -118.00, now 37.99 /// 5 Leaf Napkins (set of 4) -38.00, now 18.99 /// 6 Throw Pillow Cover -68.00 /// 7 Dinner Plates (set of 4) -58.00, now 29.99 /// 8 Placemats (set of 4) -88.00, now 22.99 /// 9 Gladiolus arrangement (they always have these flowers at my local grocery!)
The overall look has a collected feel that is casual and chic with fun patterns and warm tones reminiscent of a summer sunset. Now who's ready to throw a summer soiree? Summertime is almost here! Can I get a hallelujah?
I hope you all have a happy Easter!